 Phone: 1(877) 215.8104
 Login
LoginInstalling a template in CreLoaded
![]()
Installation of a template on to a CreLoaded website is a quite simple task. What you need to do is to download the template and upload it on your account.
- You can find professional CRE Loaded template here.
- The template usually come in .zip format and you can either extract its content on to your local computer or you can extract it online, once you have uploaded it (see next).
- Once you have downloaded the template you can use an FTP client for uploading the package to your FastWebHost account.
- You need to upload the template folder in the Templates folder of your CreLoaded installation directory. The folder should be located into the root directory of your store. You need to upload the template files there.
Once you have the CreLoaded template files uploaded on your site, you need to enter you CreLoaded admin panel at:
http://yourdomain.com/admin
Please, go to Design Control -> Template settings and click the [Template Configure] button. You will see the [Insert] button under your listed available templates.
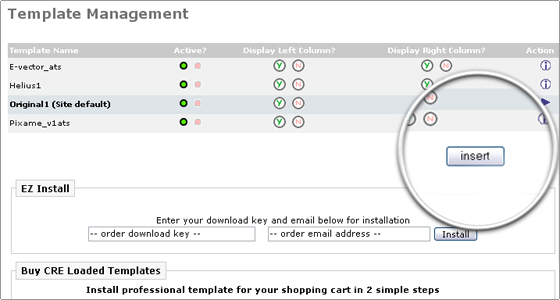
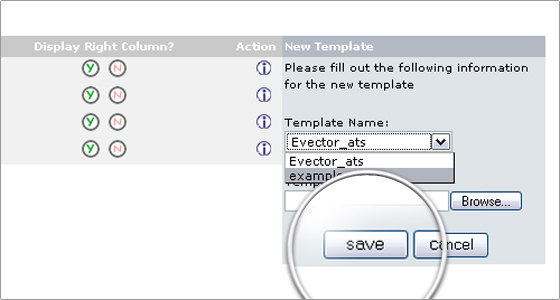
Click the [Insert] button and on to your right hand side you should see a drop down menu called Template Name. From the drop down menu you need to choose your newly uploaded template available for inserting (installation).
Please, click on the [Save] button and you will be sent to the Infobox Configure area where you will be able to move the boxes of the template and customize it further.
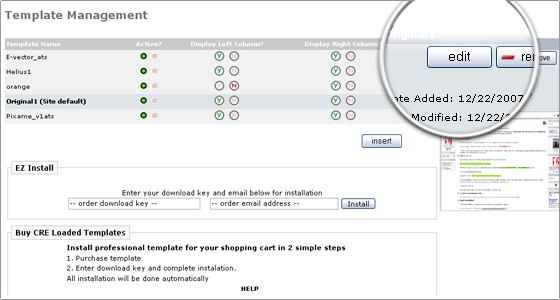
To set the template you have just installed as the default template on your site, you need to go in to the Template Configure menu.

You need to choose your newly inserted template, click the [Edit] button on to your right hand side:
On to your left side you will see many configuration settings and on the top, there is a check box – Set as sites default. You need to check that box and click the [Save] button at the bottom of the page.
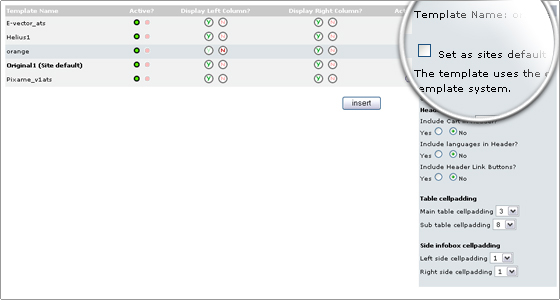
The template will be set as your websites default. Well done! You can now preview your website with the new template.