 Phone: 1(877) 215.8104
 Login
LoginGet a FREE dotProject installation with FastWebHost dotProject hosting Package!
DotProject is included in the Softaculous automated installation tool. The latest version can also be downloaded from here.
Once the dotProject installation package is stored on your local computer, you should upload it to your web hosting account. There are two ways to do it. The first one is to extract the archive on your local computer and use an FTP client. Detailed instructions can be found in our FTP tutorial.
The other way is to upload the package directly through the cPanel’s File Manager and extract the files and folders under the chosen location. If you want to load the software directly through your domain name put the installation files under the public_html folder. Otherwise, if you prefer to access it through a subdomain upload the files under public_html/subfolder. More information on how to do this can be found in our cPanel File Manager tutorial.
The files and folders permissions should be recursively changed to 755. This can be completed through your FTP client.
Additionally, prior to performing the installation, a new database for dotProject should be created and a database user should be added to it. Please check our MySQL Tutorial for more details on how to complete this task.
Open the dotProject web location through your browser (for example: http://yourdomainname.com/dotproject). Click on the link saying Click Here To Start Installation and Create One! (forwarded in 5 sec.)? or wait 5 seconds and you will be redirected to the installation page.
Follow the instructions listed below:
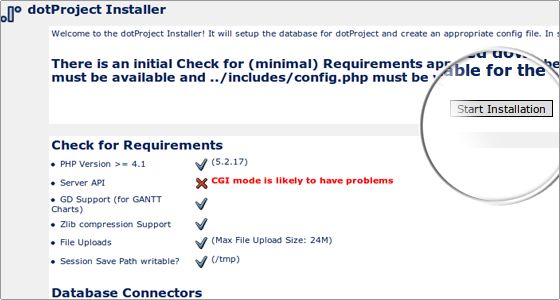
Click on the Start Installation button. The FastWebHost servers are fully compatible with the dotProject application so you can disregard the red warnings.
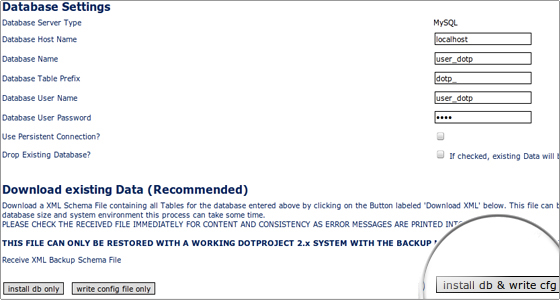
Next, fill in the information about your database:
Database Host Name: localhost
Database Name : username_database* (the name of the MySQL database you have previously created).
* Please note that it gets the user prefix. For example if you add database called ‘dpj’ and your cpanel username is ‘user’ the full name of the database is user_dpj
Database User Name: the database user that you have set (same prefix rule as for the database).
Database User Password: the corresponding database user password.
Leave all other settings as they are and click on install db & write cfg.
If you have entered all fields correctly, you should get a confirmation screen stating that the installation has been completed:
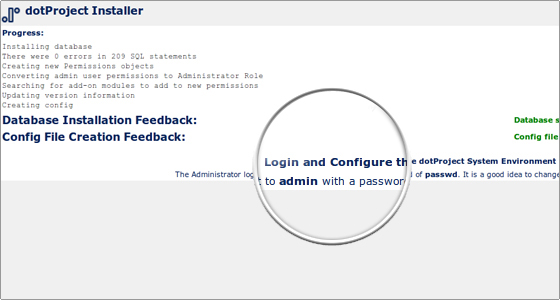
Click on Login and Configure the dotProject System Environment.
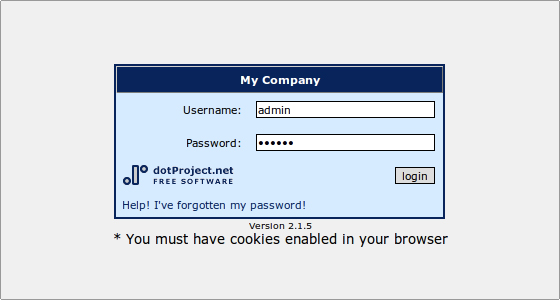
Log in with the following default details:
Username: admin
Password: passwd (It is recommended to change the default password from the dotProject admin area -> User Admin.)
You will get a warning that the install directory is still present under your account.
The directory needs to be deleted. You can do that from cPanel -> File Manager or through your local FTP client.
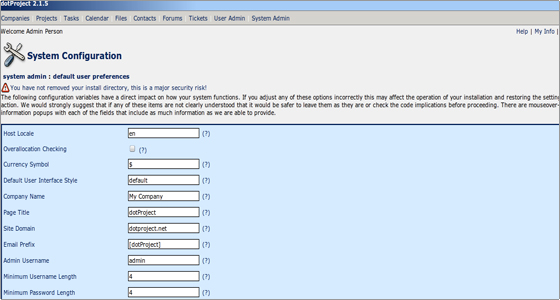
From the System Configuration list you can change the values to match your needs.
Then click on the Save button located at the bottom right corner.
The installation is fully completed. You can now add new projects to your application.