 Phone: 1(877) 215.8104
 Login
LoginHow to install Gallery on a FastWebHost hosting account
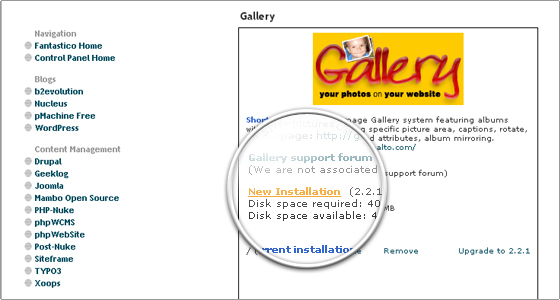
Gallery is included in the Softaculous automated installation tool and through it you can install the script on your website with just 3 mouse clicks.
In order to do that, please, log into your cPanel from your Customer area and locate the Softaculous App Installer icon.
Gallery 2 Installation Detailed Tutorial
Once in Softaculous, please find Gallery 2 from the list of applications or search for Picture galleries. Click on it and follow the instructions. In 3 clicks you will be ready with the Gallery installation.
How to install Gallery manually?
The latest version of Gallery can be downloaded from here:
http://gallery.menalto.com/downloads
Once you’ve downloaded the release you want, you can upload it to your hosting account using the File Manager tool or via FTP (Learn more about FTP clients and accounts here).
Next you need to go to the File Manager (at your cPanel) and to unpack (extract) the file in the desired folder.
How to install Gallery, once you have the files uploaded
First you need to create a new database from the cPanel -> MySQL Databases Area and then set a username from the cPanel -> MySQL Databases Area and add it to the database. You can find detailed instructions on how to create a MySQL database and attach a user to it in our MySQL Database tutorial.
Next, please, open in your browser the following URL: http://yourdomain/gallery2/install/ (provided that you have not changed the name of the Gallery 2 folder)
And follow the instructions:
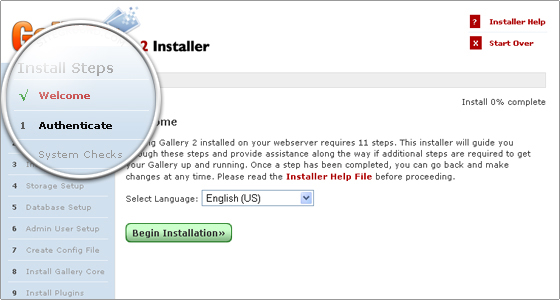
STEP 1 Select the Language you want and press [Begin Installation].
STEP 2 Go to your cPanel -> File Manager and select the [Create New File] option.
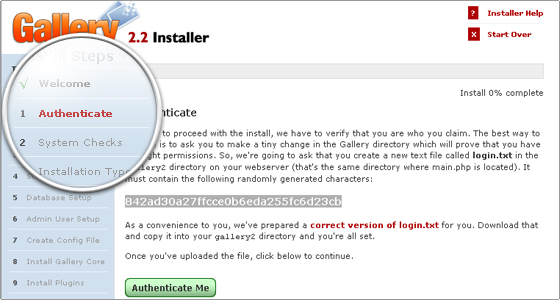
STEP 3 Name the file: login.txt. Click on the file and edit it through the link on the right side of your screen.
STEP 4 Paste the code listed at the gallery installation screen.
STEP 5 Save the file through the the Editor and then click on [Authenticate me] at the Installation process.
STEP 6 Since the FastWebHost servers are perfectly optimized for the Gallery 2 script, you should press the [Continue] button till you reach step 3.
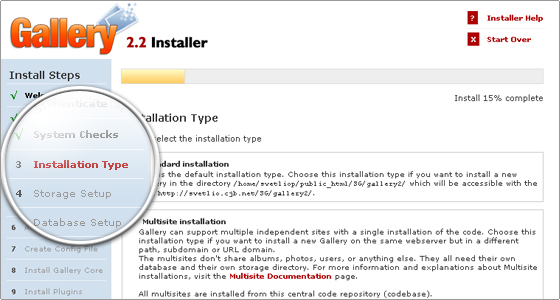
STEP 7 Select the Standard Installation and press [Continue] to step 4.
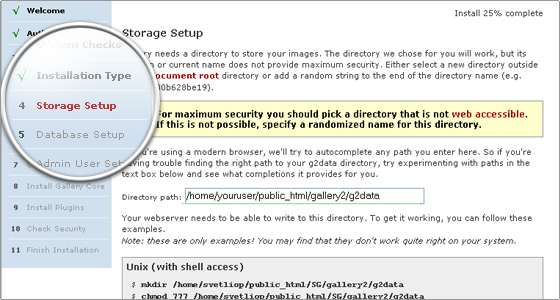
STEP 8 At the Directory Path box, you will be asked to create a folder for the Gallery 2 files. You can do this through your File Manager. You need to go to the folder of Gallery 2 under your account and to click on [Create a New Folder]. Name it to get data and click on [Save].
STEP 9 Continue to step 5 where you will need to type the database information:
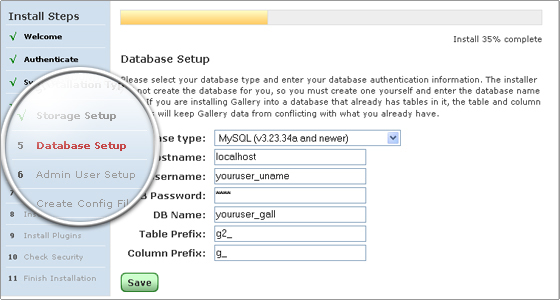
Database Type: MySQL
Database Hostname: localhost
DB username: the username that you created*
DB password: the password for the username
DB name: username_database (* Same rules as for the username)
Table Prefix : g2_
Column prefix: g_
Please note that it gets the user prefix. For example if you add a database, called ‘gallery’ and your cpanel username is ‘username’ the full name of the database is username_gallery.
STEP 10 Click [Save] and continue to step 6.
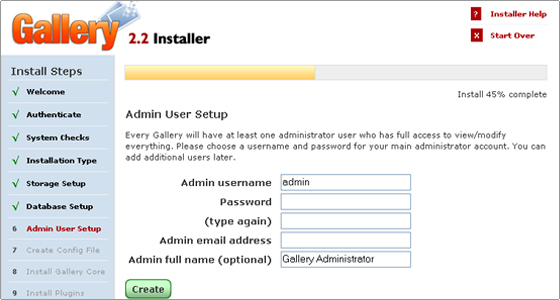
STEP 11 Fill in your admin login details here, click [Create and continue] to next step.
STEP 12 Continue to step 8.
STEP 13 Continue to step 9.
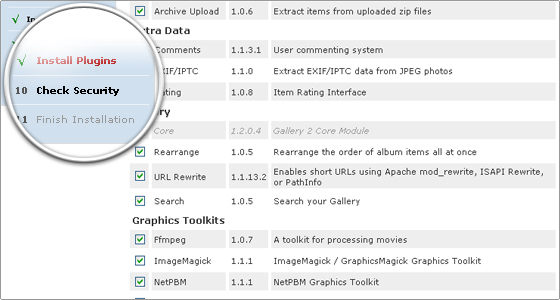
STEP 14 Click on [Activate Selected Module] at the bottom of the page.
STEP 15 Continue to step 10.
STEP 16 Continue to step 11.
STEP 17 Click on [Go to my Gallery]. The installation is completed.
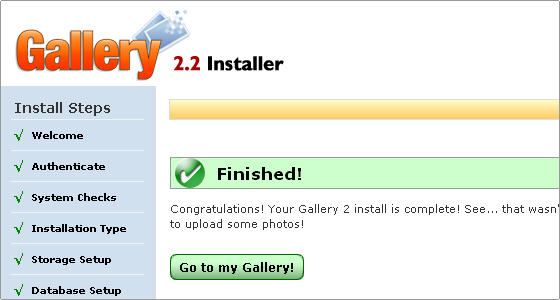
WELL DONE!
You have successfully installed Gallery 2 on your hosting account.
 FastWebHost support team can install Gallery software for you FREE!