 Phone: 1(877) 215.8104
 Login
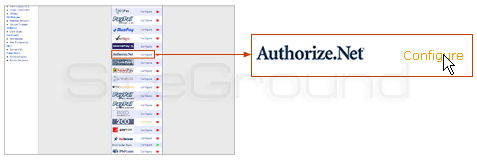
LoginClick on the button “Configure” next to the Authorize.net logo.
On the next page, you will see the following:
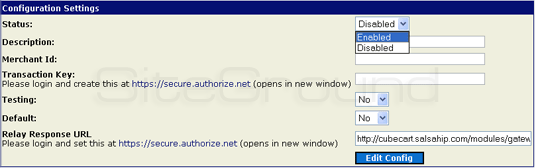
- You have to “enable” the status of the gateway (it is disabled by default).
- In the description field, type “Credit Card” – this is the payment way you wish your customer to pay.
- In the Merchant ID field, please type your merchant ID as given by MerchantLogic.
- “Transaction Key” field – you first have to get such a key from Authorize.net (the gateway).
- If you set the Default field to “Yes,” “Credit Card” via Authorize.net will be preselected as the default payment way upon customer checkout.
- You can fill in the Relay Response URL field after you take the necessary information from Authorize.net.
After you have filled in all the fields, please click “Edit Config” to save the changes you made. You are now ready to start selling your products or services via Authorize.net