 Phone: 1(877) 215.8104
 Login
LoginYou can install eGroupware software by following these Step-by-step instructions:
STEP 1 Download the latest installation package from the eGroupWare Downloads page. You should choose the platform independent release in tar.gz, tar or zip format. Then you will have the latest stable release of the script in your computer. Extract it.
STEP 2 Upload the eGroupWare files and folders in the public_html folder of your account. You can do that through FTP with a client like FileZilla. In this way, after the installation is completed, the script will load directly through your domain (for example: www.yourdomainname.com). You can also install eGroupWare in a subfolder – simply upload the installation file there (for example public_html/subfolder). Then the eGroupWare installation will be accessible through www.yourdomainname.com/subfolder.
STEP 3 Next, you should create a MySQL database for eGroupWare and add a user to it. Please follow the instructions on how to create a MySQL database and user here.
Step 4 You should open the .htaccess file from the installation directory and comment all the lines, which start with the php_ value. You should put the sign “#” in front of them. Then you should set the following variables in a newly created php.ini file:
magic_quotes_gpc = Offmbstring.func_overload = 7
You should copy this file under every subfolder of the eGroupWare installation directory. This task can be easily completed through cPanel -> PHP Variables Manager.
STEP 5 Change the file permissions for the eGroupWare installation directory to 755 through cPanel->File Manager.
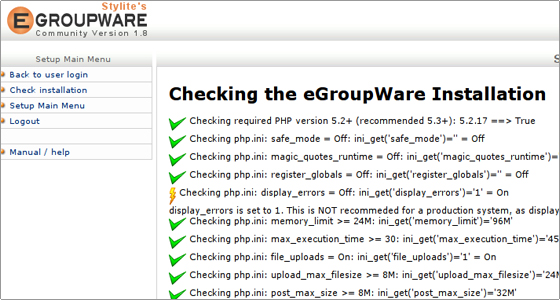
STEP 6 Navigate to the web address of your eGroupWare installation and run the installation tests.
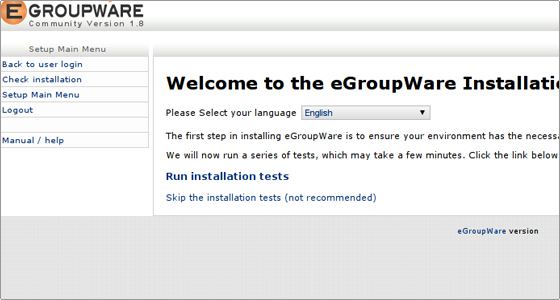
Once they are completed you should follow the Continue to the Header Admin link. However, if there is a problem, which occurs during the tests and you can not fix it, please post a ticket from your Customer Area->Get support->Get support-Help Desk. Then a member of our Technical Support Team will assist you with the installation of the script.
STEP 7 Now you are ready to set up the primary configuration of your eGroupWare script installation.
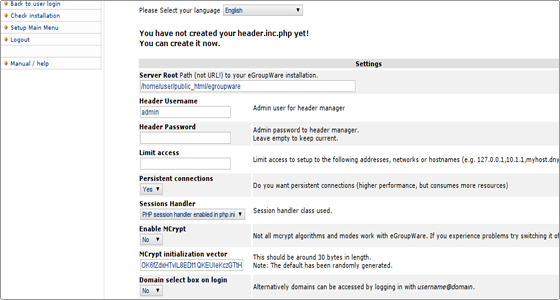
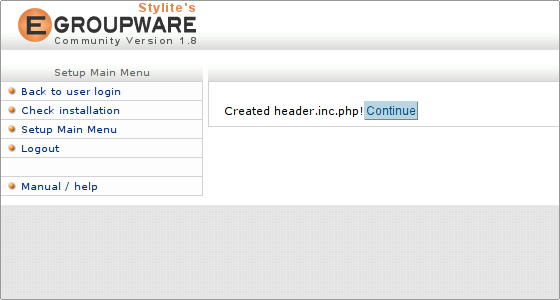
The first variable (Server Root) is automatically set by the script and you should not change it unless you know what you are doing. Then you should set the login details for the admin user for the header manager. This user has the rights to change the primary configuration of the script after the installation is completed. The next field allows limiting the access to the setup to desired IP addresses or hostnames. You can leave the next nine fields unchanged, since they contain default values. Then you should set the database name, the database user and the password. You should use the ones, which you have set in Step 3 of the installation instructions. Once it is completed you should set the login details for the configuration user. The last step is to write the configuration and continue to the setup section by clicking on the Continue button.
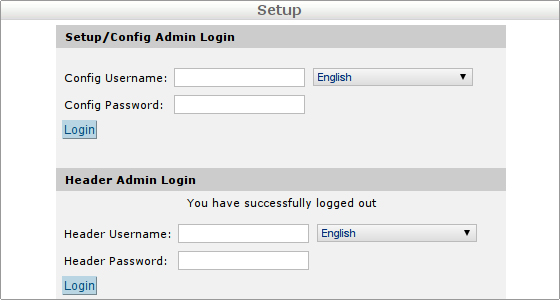
STEP 8 In the setup section you can reconfigure the script through Header Admin Login or to setup the script through Setup / Config Admin Login.
STEP 9 Once you login with the configuration login details, you will be able to setup the applications, included in the script.
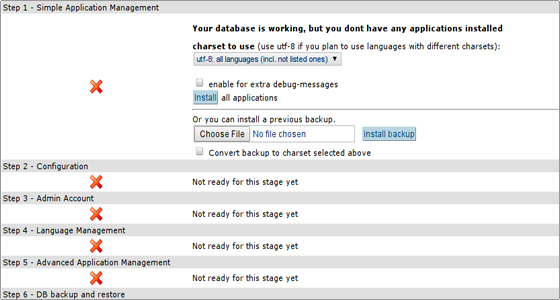
First you can select the desired char-set for your database. Then you should install the applications by clicking on the install button. After this recheck the installation using the Re-Check My Installation button.

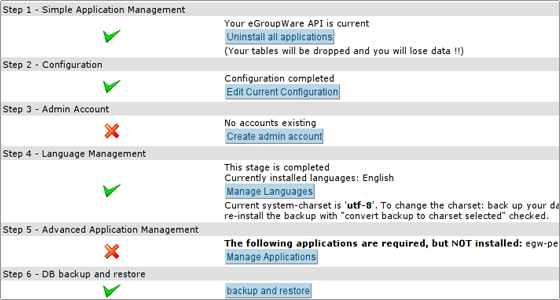
STEP 10 Navigate to Step 2 and edit the current configuration of the script applications, which you have installed:

In the path information section you should specify the absolute paths to two folders, called files and backup, which should be created through your File Manager in the root folder of your account. They should be on the same level as the public_html folder. If the user of your account is “user” (the one, which you use to log in your cPanel), then the absolute paths will be:
/home/user/files
and
/home/user/backup
You can leave the Host information unchanged, since it is automatically configured by the script. However, if you install the script outside the account, which you have with FastWebHost, you could edit this section.
The Standard e-mail server settings would look like the following ones:
POP/IMAP mail server hostname or IP address: mail.yourdomainname.com Mail server protocol: IMAP or POP-3 Mail server login type: standard (login-name identical to the eGroupWare username) Mail domain (for Virtual mail manager): SMTP server hostname or IP address: mail.yourdomainname.com SMTP server port: 25 User for the SMTP authentication (leave it empty if no auth required): emailuser@yourdomainname.comPassword for the SMTP-authentication: the corresponding password, which you have set during the creation of the e-mail account in cPanel->Email Accounts.
Troubleshooting Tips: Please mind that you should change yourdomainname.com with the actual domain, which you have used in Step 2 of the installation instructions. You should also change emailuser@yourdomainname.com with an existing e-mail account, which you have created through cPanel->Email Accounts.
You can leave the rest of the fields with their default values and navigate to the Save button. In this way you have completed the setup of your script. Now you should create an administrator user for it.
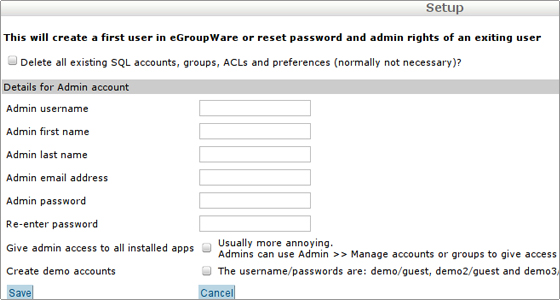
STEP 11 You can create the administrator user by clicking on the Create admin account button.
Enter the details for the admin account.
Once you are ready, you can navigate to the main URL of your eGroupWare installation. You have successfully completed the installation procedure.
The other options in the setup part allow you to change the default language, to manage the installed applications, which are included in the script, to add new applications or uninstall existing, to create and restore backups of your script installation.