Phone: 1(877) 215.8104
 Login
LoginGet a FREE osCommerce installation with the eCommerce hostingpack!
On the FastWebHost servers, osCommerce can be installed very easily. They are optimized to fully satisfy the script’s system requirements and provide the best hosting solution.
FastWebHost no longer provides Fantastico autoinstaller on the servers. The new installer now available is Softaculous. In extensive tests it has proven to match our outstanding service quality standards better, by providing more applications, faster version updates and better support. You can read more about why FastWebHost now uses Softaculous in our blog.
For more information on how to install osCommerce with just few clicks, please check our tutorial on How to Install osCommerce with Softaculous.
If your host does not support autoinstallers, please check our osCommerce Manual Installation tutorial.
To start your online store, you will can install the osCommerce shopping cart through the Fantastico Script Autoinstaller. Fantastico is located at the bottom of the cPanel menus.
How to install osCommerce?
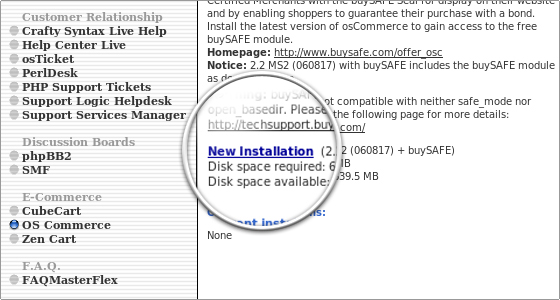
Once logged into Fantastico, look for the osCommerce link in the left menu and click on it. A short description will appear in the right part of the screen. Follow the New Installation link to start the setup of your shop.
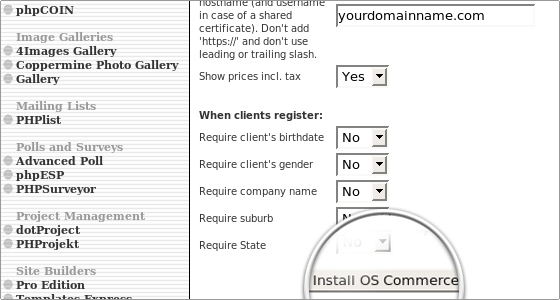
Select the domain name that you wish the shop to be attached to. In the box below type in the folder you would like to have the store in – you can select a name to your preference (e.g. ‘shop’, ‘store’, ‘catalog’, etc.). Then fill in the administrator username and password, the name of the shop and its owner and the contact e-mail address. Unless you have an SSL certificate already purchased and set up, please leave the Use SSL option to No. The last six options are to your preference.
Click the Install OS Commerce button to proceed to the next step.
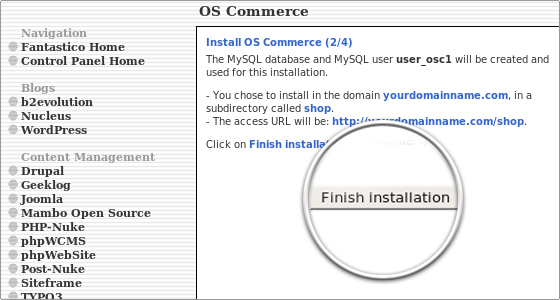
On the next page you will be asked to confirm the details you have entered. Click on the Finish installation button to go to the next step.
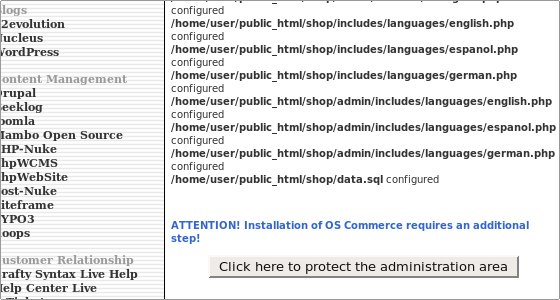
The third page displays confirmation that the setup and the configuration have been successful. The installation requires one last click on Click here to protect the administration area in order to be completed.
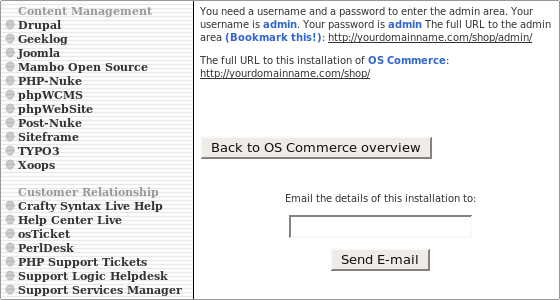
On the final page, you will see the addresses of the store and the administrator’s panel. Add these to your bookmarks, as you will visit the two addresses often.