 Phone: 1(877) 215.8104
 Login
LoginGet a FREE ZenCart installation with FastWebHost ZenCart hosting services
To install ZenCart on your hosting account manually, you should download the latest release archive on your hard drive. You can download the ZenCart files from here.
Upload the ZenCart file on your hosting account
Once you have downloaded the installation archive you would like to use, you can upload it to your hosting account through an FTP client or the File Manager tool under your Cpanel. More detailed information on how to complete the task can be found here:
- How to upload your website with FTP?
- How to upload your website with Cpanel -> File Manager?
As soon as the upload of the file is completed, you can unpack it using the File Manager tool. In order to do that, you should open cPanel -> File Manager, find the ZenCart package, click on it and extract it using the Extract button. Then using your FTP client move the files and directories from the newly created folder named after the version number to your actual shopping cart folder.
Creating a Database and Adding a User to It
You can create a MySQL database and add a username to it through cPanel -> MySQL Databases. More information on how to do this can be found in the How to create MySQL database and user tutorial.
ZenCart Web Installation
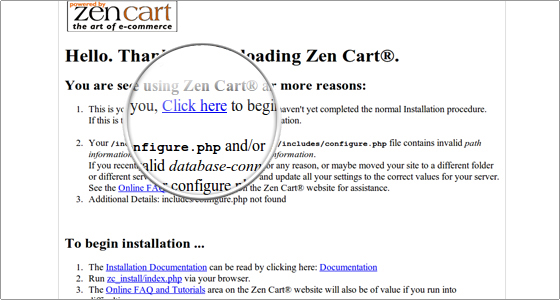
To start the installation, you should go to yourdomainname.com/shop (for the purposes of this tutorial, we will assume that /shop is the folder of your ZenCart installation) and click on the Click here link.
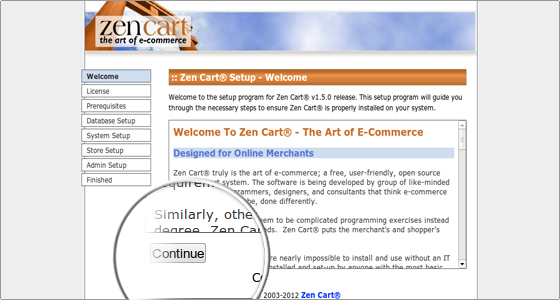
The installation script’s welcome page will be opened. Click on Continue.
Agree with the ZenCart’s license terms. Again, click on the Continue button.

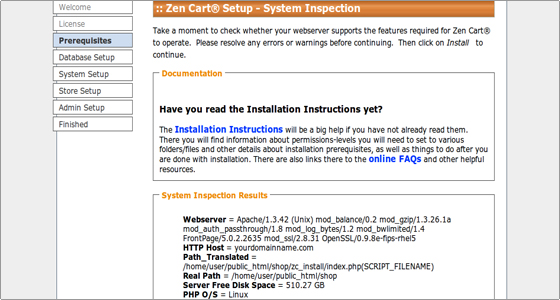
Preinstall checks will run. All FastWebHost servers are fully compatible with the ZenCart system requirements. In order to proceed click on the Install button.
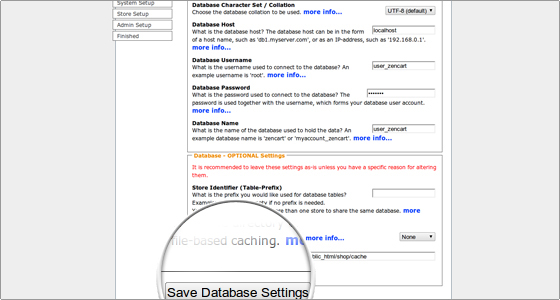
On this page you should fill in the database information you have entered in cPanel->MySQL Databases. For example:
Database Host: localhostDatabase Username: user_zencartDatabase Password: your passwordDatabase Name: user_zencart
Then click on Save Database Settings.
The next page shows the System Setup. In most cases you won’t have to change the settings here because the installation script detects them automatically.
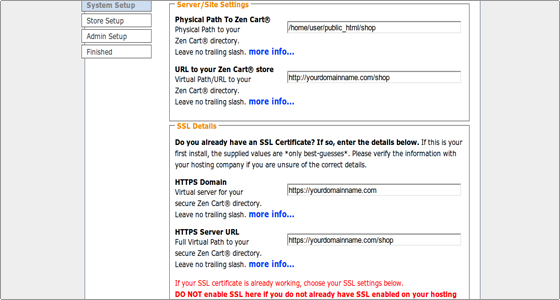
Click on Save System Settings to proceed further.
Next, the ZenCart installation will prompt you to enter the shop info.
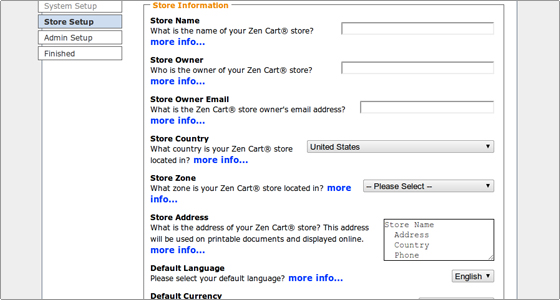
After you fill in the details, don’t forget to click on the Save Store Settings button to proceed to the administrator account page.
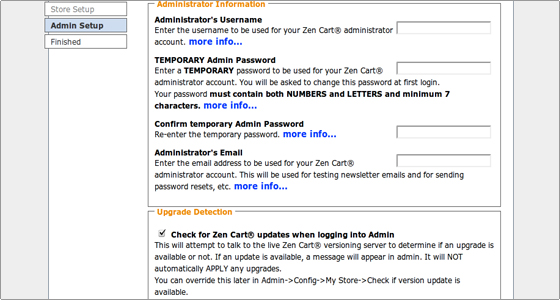
Enter the administrator’s username, the temporary password that should be changed after the first login and the corresponding admin e-mail. Click on the Save Admin Settings button to store the data.
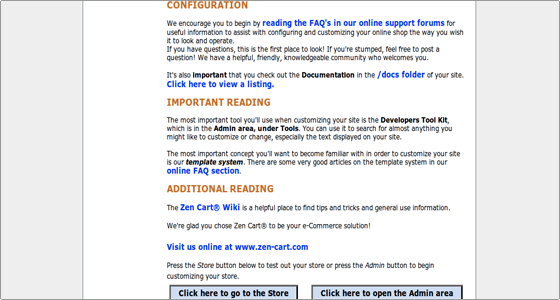
A confirmation page regarding the successful installation will be displayed.
There are several more steps that you should make to complete the installation.
- Delete the zc_install folder.
- For better security rename the admin folder to a more complicated one.
- Change the permissions of the files includes/configure.php and admin/includes/configure.php to 444.