 Phone: 1(877) 215.8104
 Login
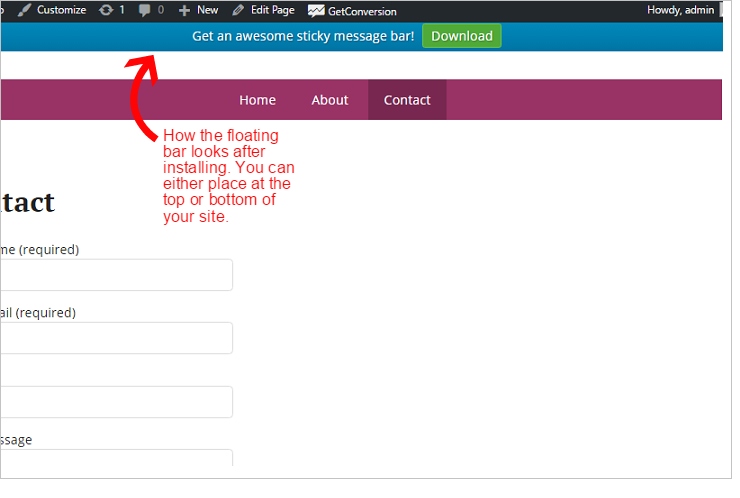
LoginAdding a floating bar to your WordPress website allows you to show to visitors current promotions you have going on or show information you want them to see. Floating bars or “sticky” bars are notification bars that are placed on the bottom of the visitor’s browser and stays there as they are scrolling. Sticky bars are now very common to use amongst bloggers and WordPress users.
If you wish to catch a visitor’s attention to promote an article, make an announcement about a product, etc. then adding a sticky bar will do just that. You can also use it for social media promotions to get more subscriptions.
There are different options, styles and features you can choose to add to your sticky bars. WordPress has various plugins available to add the floating bar to your site. In this article, I will show you how you can add a sticky floating bar to your WordPress site.
Installing the floating bar to your blog
To start adding a floating bar to your site, go to Plugins > addnew
I will be using the GC Message Bar plugin. Go to the search form and type in GC Message Bar. Once you get the search results, you can begin installing the plugin.
As soon as you press to activate, you can check out your blog and see that the floating bar is already up. The default settings for the plugin places the floating bar at the top of your site, but you can configure the settings to your liking.
To start configuring your floating bar go to your dashboard, Plugins > GCMessageBar
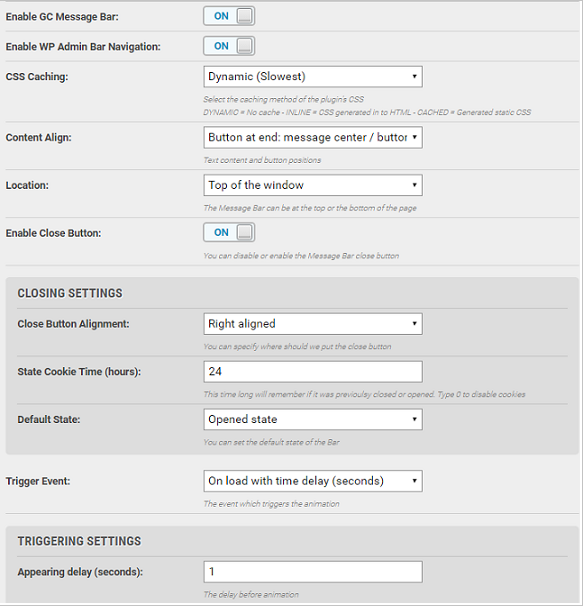
From here, you can select your background color, text color, floating bar location, etc. To pick the location of your bar, go to the General Settings tab.
General Settings tab you can also enable animations, alignment of your content, enabling a close button, CSS caching, and more.
Filters tab allows you to choose whether you want the floating bar to show up on just the desktop, or both mobile and desktop. You can also choose whether you want your floating bar to show up only on your home page or on other pages as well.
Compose Message tab is where you write what you want your floating bar to display and type in the URL location of where you want your visitors to be directed.
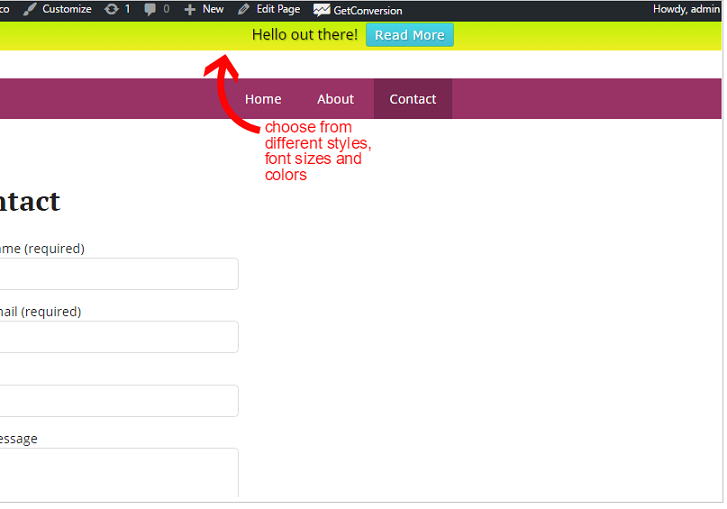
Style Settings tab choose the footer color, text, color, font size, font style, etc.
After getting familiar with the settings, you can start configuring your floating bar to get it ready to show up on your WordPress site. Don’t forget to press save anytime you make any changes.


Leave a Reply