Phone: 1(877) 215.8104
 Login
LoginGet a Professional Affordable Claroline installation with FastWebHost Claroline hosting Package!
The installation of Claroline includes uploading the installation package via cPanel’s File Manager or using an FTP client. The latest release can be found at the Claroline’s official website.Bear in mind that the uploaded package should reside under the public_html directory, which is the web root folder for your account, or alternatively under a subdirectory of it.Additionally, prior to performing the installation, a new database should be created. You can easily do this following the MySQL Tutorial.
How to install Claroline?
The next step is to access the directory where you have uploaded the Claroline installation package.
- In case you have uploaded it directly under the public_html folder it will be accessible directly via your domain name – http://yourdomainname.com.
- In case you have used a subdirectory, for example “claroline”, it will be accessible via http://yourdomainname.com/claroline.
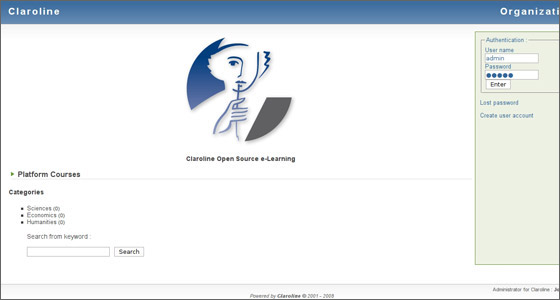
If everything is done right you should go to http://yourdomainname.com/claroline/install where you should see the following page:
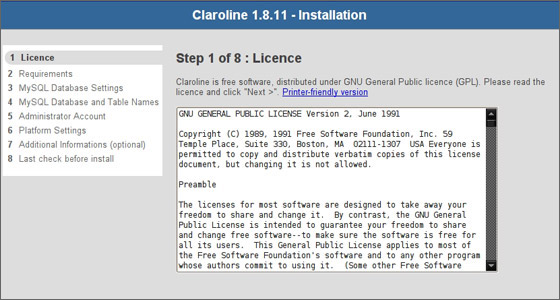
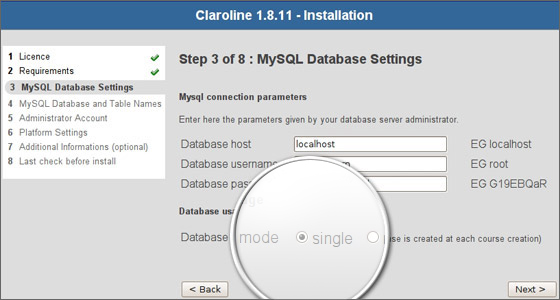
Press the “Next” button to continue. The next step will lead you to a page where Claroline will check the server requirements.The next thing to do is enter your MySQL details. Here, you have to enter the details of the MySQL username that you have already created. In the “Database mode” field make sure you have selected “single” mode.
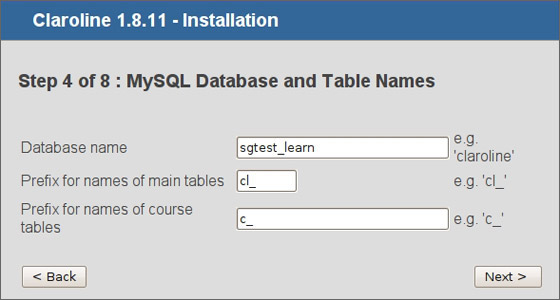
When you press the “Next” button you will be taken to a new page where you should specify the name of your database.
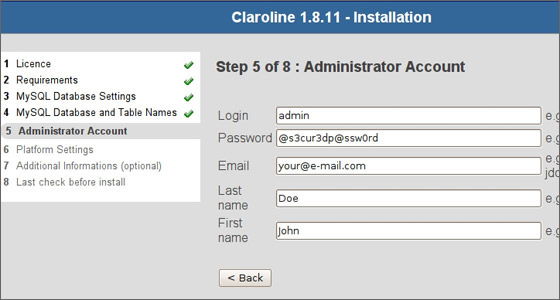
Next, you have to enter the administrative login details for the application. Make sure you enter a valid e-mail address and that you remember the password for the administrative username.
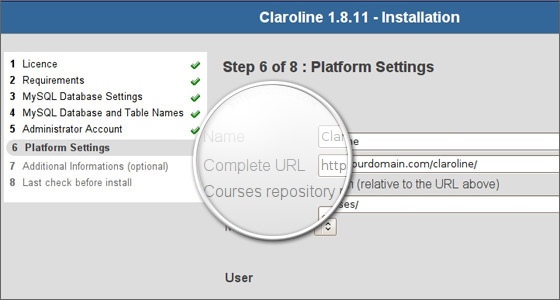
Now you should check if the “Complete URL” filed shows the correct URL to your application – http://yourdomainname.com/claroline/ in our case. If you are installing Claroline into a subdomain, you should make sure you have this value set correctly. All other settings on this page should remain at their default values.
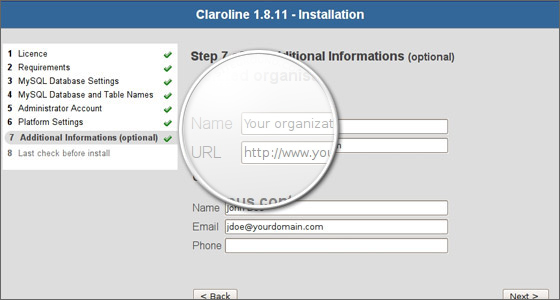
You have almost finished the installation now. There are two pages left to configure, however. First, you should enter the name of your organization and the URL of its website if any.
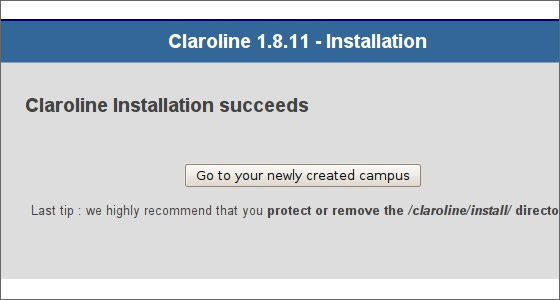
Next you will see a page that summarizes the settings you have entered. You should carefully check them and press the “Install Claroline” button. If you have set everything correctly, you should be forwarded to a page that instructs you to delete the “install” directory from your script directory. Once you have done that, just press on the “Go to your newly created campus” button.
Congratulations! You are now ready to start building your online courses!