Phone: 1(877) 215.8104
 Login
LoginAlthough Joomla comes with a lot of built-in functions by default, with extensions you can add a whole new functionality to your site with just a few clicks. In this tutorial we will look through all three available methods for adding extensions to your site.
Joomla 3 Extensions Tutorial Content:
- Access the Joomla Extension Manager
- Option 1: Upload Package File
- Option 2: Install from Directory
- Option 3: Install from URL
Access the Joomla Extension Manager
The first thing you need to do is to login to the administrative area of your Joomla website. Once you do that, access the Joomla Extension Manager by going to Extensions -> Extension Manager.
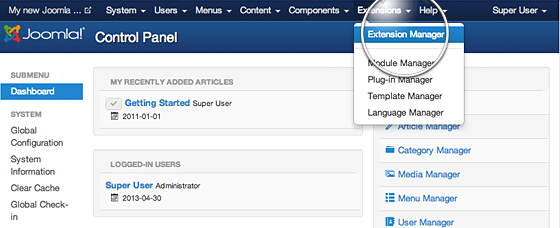
Once you open the Extension Manager, you have three options to chose from to install your extension. In most cases, you should go for the first option but it’s good to know that there are alternatives.
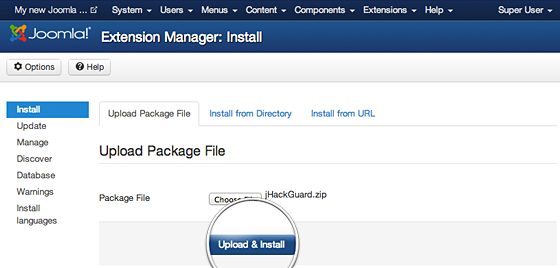
OPTION 1 :Upload Package File
This is one of the most convenient options available. All you need to do is hit the Browse button, browse to the location of your extension’s archive on your local computer, and press the Upload & Install button.
INFORMATION! :Some Joomla extensions have additional information in their package like documentation, image resources, etc. Such packages need to be unpacked first and they have another archive inside that should be used in the installation itself. Usually, such packages are named UNPACK_FIRST.zip or similar. If you encounter error messages stating that the extension cannot be recognised as such, please try unpacking the archive file first.
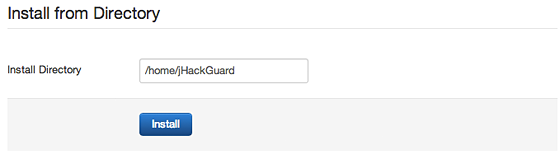
OPTION 2 : Install from Directory
This option is suitable for large extensions, that exceed in size the server PHP Upload Filesize limitation and cannot be uploaded through the previous method. Such components, modules or plugins must be uploaded via FTP to a folder in your hosting account since FTP can transfer much bigger files. For more information on how to use FTP to upload your extension check out our FTP Tutorial.
IMPORTANT! It is important to know that unlike the first method, you need to extract your extension first and upload the folder and not the zip archive.
Once you have uploaded the extension directory to your hosting account, go to the Extensions Manager and specify the path to that folder. Finally, press the Install button. Joomla 3 will check the folder you’ve specified and install the extension if it is uploaded correctly.
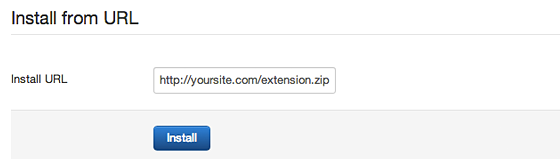
OPTION 3: Install from URL
The third available option for Joomla extensions installation is directly though an URL. All you need to do is to enter the direct address of the zip archive with the extension you want to install and press theInstall button. Joomla 3 will download, extract and make the necessary installations for you.