 Phone: 1(877) 215.8104
 Login
LoginThe primary use of the Magento multistore functionality is to create multiple stores accessible on different URLs under the same Magento installation. All stores under the Magento multistore installation share the same backend, which makes the administration easier.
The first step to setup Magento multistore is to install Magento. You could do that by either installing the application through Softaculous or by installing Magento manually.
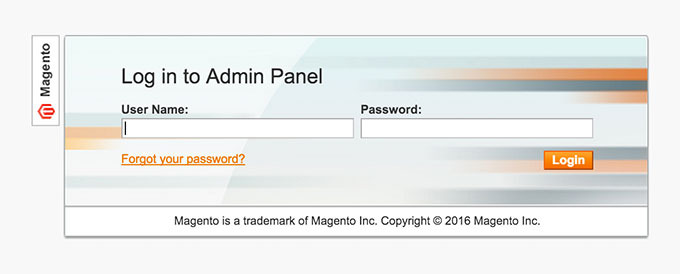
Once you have installed Magento, you could start building your multistore. To do that, first log in the backend of your Magento installation:
Once you logged in, follow the steps below to add a new store:
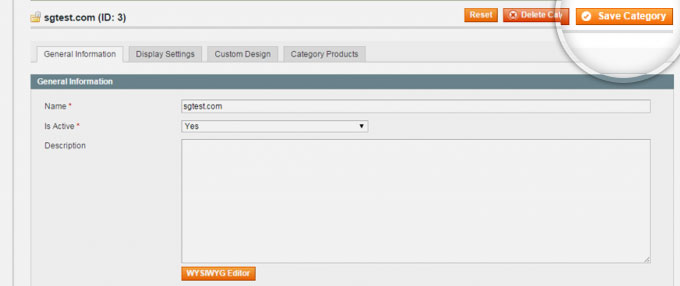
- Go to Catalog –> Manage Categories.
- Click on the Add Root Category button.
- Enter the name of your store. In this tutorial, we will use sgtest.com.
- Select Yes from the drop down menu of the Is Active setting.
- Click on the Display Settings tab and select Yes from the drop down menu of the Is Anchor setting.
- Save the category.
Once the category is saved, you could create the new store. You could do so by:
- Go to System –> Manage Stores.
- Click on the Create Website button.
- For Name, we will use sgtest.com and for Code – sgtest.
- Save the website.
- Click on the Create Store button.
- Select sgtest.com for Website and Root Category. For Name, we will use Main Store.
- Save the store and click on the Create Store View button.
- Select the newly created store ( sgtest.com ) from the drop down menu. For the Name and Code, we will use sgtest. Select Enabled for Status and save the store view.
The last steps to complete the store creation is to configure its settings through the configuration of your Magento. Follow the steps outlined below:
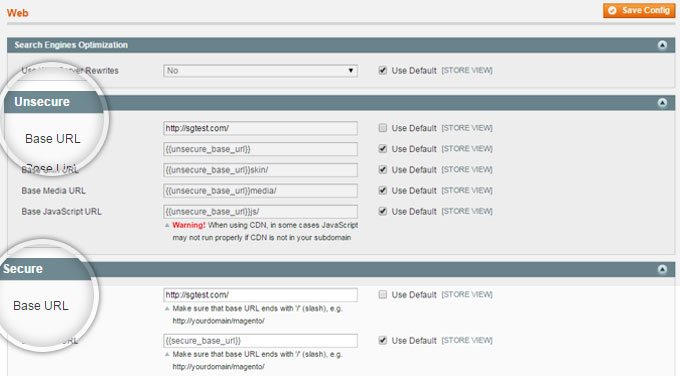
- Go to System –> Configuration.
- Select the newly created store from the Current Configuration Scope drop-down menu on the left side
- Go to the Web tab, uncheck the Use Default box next to Base URL and change both the Secure and the Unsecure URLs to your domain, in this case, http://sgtest.com/. Make sure to add the trailing slash at the end of the URL.
- Save the configuration.
After the store is created through the backend of Magento, you should choose how the new domain will be used. There are several possible setups and we will explain each one of them below.
Parked Domain Method:
![]()
In order to use that method, first you need to add your domain as a parked domain through your cPanel.
Once the domain is added, open the index.php file of your Magento and find the line with the following code:
Mage::run($mageRunCode, $mageRunType);
This should be the last line in the index.php file. Right before that line, add the folowing block:
switch($_SERVER['HTTP_HOST']) {
case 'sgtest.com':
case 'www.sgtest.com':
$mageRunCode = 'sgtest';
$mageRunType = 'website';
break;
}
If you want to use more than one domain, you should add a new block for every domain. Fore example:
switch($_SERVER['HTTP_HOST']) {
case ‘sgtest.com’:
case ‘www.sgtest.com’:
$mageRunCode = ‘sgtest’;
$mageRunType = ‘website’;
break;

case 'mythirdstore.com':
case 'www.mythirdstore.com':
$mageRunCode = 'thirdstore';
$mageRunType = 'website';
break;
}
Save the index.php file, clear the cache of your Magento and you should be able to access the newly created store with its domain name.
Addon Domain Method:
This method may be useful to you if you want to have a blog on one of your stores and not on the others. You could not achieve that with parked domains.
To use the Addon Domain method, you need to add your domain as an addon domain through your cPanel. This will create a separate document root directory for that domain. By default, cPanel will name the directory with the same name as the domain. In this case, it will be sgtest.com and it will be inside the public_html folder.
Once the domain is added, you need to establish an SSH connection to your account. Once connected, go to the directory that we previously created for the addon domain. In our case, the command is:
cd public_html/sgtest.com/
Copy the index.php and the .htaccess files of your Magento installation to that directory:
cp ../index.php ../.htaccess .
Open the index.php file and right before the last line, add the following code:
$mageRunCode = ‘sgtest’;$mageRunType = ‘website’;
Once you add the code, save the file and close it. The last step to complete the create eight symbolic links that will point to the core Magento directories. You could do that by executing the following commands in the document root directory of your addon domain:
ln -s ../app/ app
ln -s ../errors/ errors
ln -s ../includes/ includes
ln -s ../js/ js
ln -s ../lib/ lib
ln -s ../media/ media
ln -s ../skin/ skin
ln -s ../var/ var
Please note that depending on where the document root directory of your domain is, the path in the commands may defer. Once the links are created, clear the cache of your Magento and you should be able to access the newly created store with its domain name.
Subdomain Method:
![]()
The setup of that method is the same as the Addon Domain Method with the exception that this method uses subdomains instead of addon domains. You could add subdomains through your cPanel. Once the subdomain is added, follow the same steps described above.