 Phone: 1(877) 215.8104
 Login
LoginA hosting package is a set of options and features that define a hosting account.
Having different packages means you can offer different types of hosting accounts based on their features.
For example, you can create different packages based on disk size quota, maximum number of mail accounts, maximum number of databases, etc,
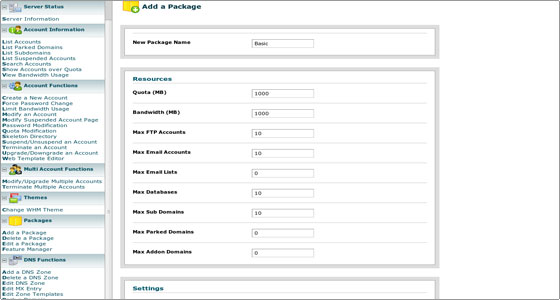
To create a new package click Add a Package.
Let’s call it Basic, give it 1000Mb of disk space and bandwidth and limit some of the other options as well. You can also choose to assign a Dedicated IP, allow Shell access, install Frontpage extensions (we strongly advise you to leave this disabled – Frontpage is no longer supported and will most likely cause only problems) and allow CGI Access (this is enabled by default and we advise you to leave it that way).
You can also change the cPanel theme (we’ll set it to x3 here), choose a Feature List (default in this case) and select a Locale (English in our example).
Here’s what our Basic package looks like before we add it:
To save it, click the Add button at the bottom of the screen. You will receive a confirmation that the package has been successfully created.
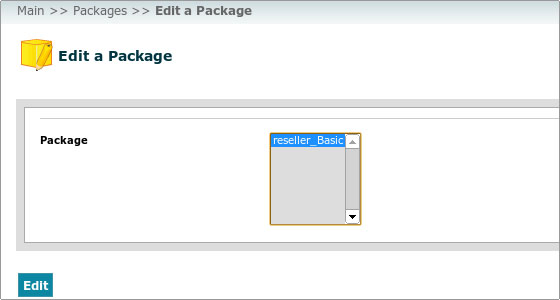
To edit a package, click Edit a Package, select the package you want to edit (in our case reseller_Basic) and click Edit to modify it.
You will have the same options as when creating the package. When you are done with the changes, click Save Changes to save the modified package.
Deleting a package is trivial – you should click Delete a Package, select the package you want to delete and click the Delete button to remove it.
The last option in the Packages section is the Feature Manager. We will cover this option next.