 Phone: 1(877) 215.8104
 Login
LoginRequirements:
Here are the server requirements needed to run Textpattern.
- PHP 4.3+
- MySQL 3.23+
- The PHP mysql extensions
- The PHP XML Extension
And here are the recommended settings,
- PHP 4.4.1+ or 5.0.2+, in mod_php or fastcgi mode
- MySQL 4.1.7+
- PHP extensions: mbstring, XML, Zlib
- Apache 1.3+ with mod_rewrite
- A Unix server OS with locale support
To start the installation, you should access the directory where you have uploaded the installation package via your web browser. A blank page with only one link pointing to the installation setup will load.
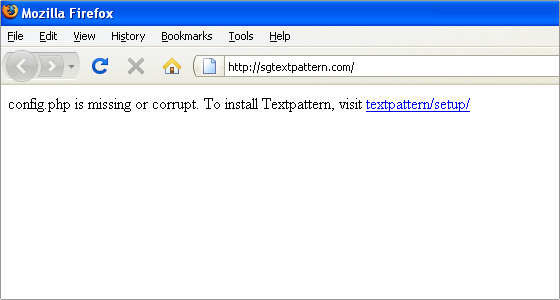
Alternatively you can access the setup directly via:
http://yourdomainname.com/textpattern_install_dir/textpattern/setup/
Where ‘yourdomainname.com’ is your actual domain name and ‘textpattern_install_dir’ is the sub-directory of public_html where you have uploaded the installation files.
On the next page you can choose the default Language for the installation. Note that the language pack will be applied to the whole administrator backend as well as to the front end.

Choose the desired language from the drop down menu and click submit. For the purpose of this tutorial, we’ll choose English.
On the next page you should enter the database details for the new installation. Use the details for the database and the user you have already set up.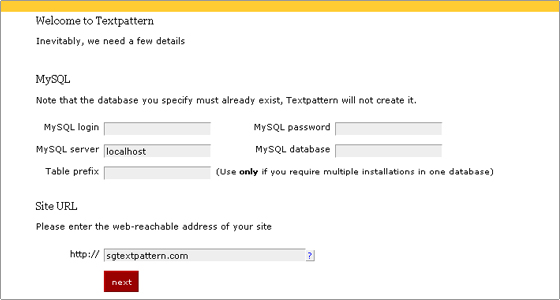 Here is the data you need to enter:
- MySQL login – This is the MySQL username you have added with full privileges to the database.
- MySQL password – The password for the user you have created
- MySQL server – this should remain localhost
- MySQL database – The name of the database you have created for the installation.
- Table prefix – this field can remain empty (considering you are using a new database)
- Site URL – This should automatically get your actual site URL – the one you have used to access the installation.
Once you have entered the needed details you can click the Next button.
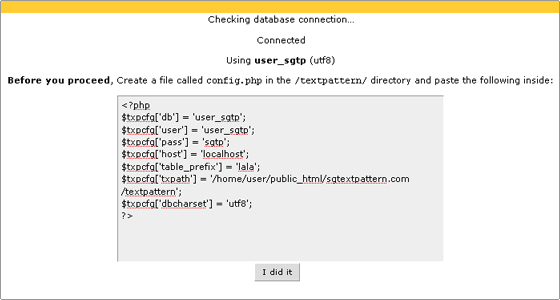
The next step will verify the database login details and if everything is in order, you will be provided with the content of the configuration file for the application. You should copy this content, then create the file config.php using it and place it as instructed by the installation. Once you are ready, click the “I did it” button.
Next you will be asked to set the administrative details for the installation. Fill in the fields and click Next.
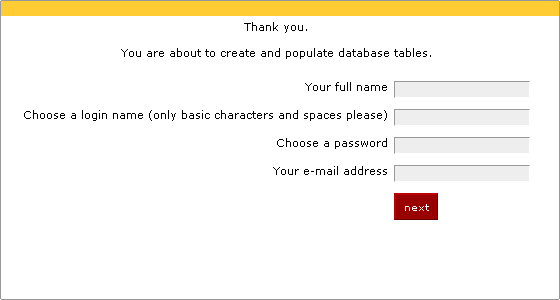
This is all. The next page should display that the database tables were successfully created and populated. Also you will be provided with a Link to the administrative area for the application.
