 Phone: 1(877) 215.8104
 Login
LoginIn this section you will learn how to add products to your PrestaShop.
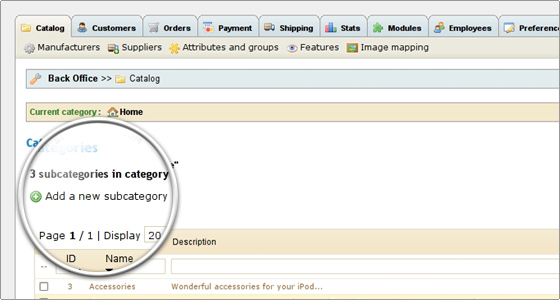
First, we will show you how to create a new category of products for your shop. To do this, login to your admin area and go to the Catalog tab. Press the “Add a new subcategory” button.

On the next page you have to add the information for your category. Please note that if you have a multi-language application, you should press on the language icon in order to add descriptions for all languages you have installed. Once you are ready, press the “Save” button and the category will be added.
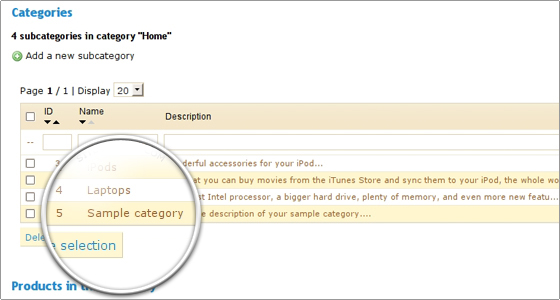
Now you can add some products to the newly created category. Go to the Catalog page again and click on the “Sample category” link in the table of categories.
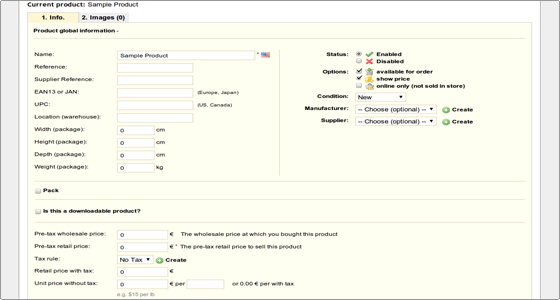
Click on “Add a new product” in order to add a product to the selected category. On the next page you should enter the details for your product – name, image, price, attributes, etc. Once ready, you can click on either “Save and stay” or the “Save and back to category” buttons depending on whether you are done entering information for the product. Once you save and enable it, the product will become available for your visitors to purchase.
Now you can add as many product categories and products to your e-shop as you want.