Phone: 1(877) 215.8104
 Login
LoginIn this section you will learn how to install PrestaShop on your website. You can find the latest release of PrestaShop at the PrestaShop’s official website.
In order to initiate the installation you should follow these steps:
- Download the Latest Release from the PrestaShop’s official website.
- Extract the package locally on your computer.
- Upload the installation package via cPanel’s File Manager or using an FTP client. Bear in mind that the uploaded package should reside under the public_html directory, which is the web root folder for your account, or alternatively under a subdirectory of it.
- Prior to initiating the installation, a new database should be created. Add the corresponding user to the database. You can easily do this following the MySQL Tutorial.
How to install PrestaShop?
After you have managed to upload the PrestaShop installation package in the desired directory, you can start with the installation itself.
First you have to access the directory where you have uploaded the PrestaShop installation package.
- In case you have uploaded it directly under the public_html folder, it will be accessible directly via your domain name – http://yourdomainname.com;
- In case you have used a subdirectory, for example “presta”, it will be accessible via http://yourdomainname.com/presta;
If everything is done right, when you go to http://yourdomainname.com/presta you will see the following page:
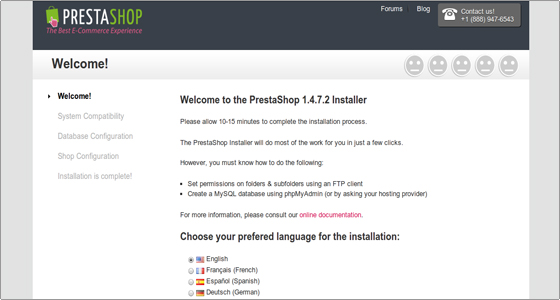
In the first step of the installation process you can select the language you prefer to use in your online shop. For the purposes of this tutorial we will select English. Choose the language you wish and press the “Next” button at the bottom-right part of your screen.
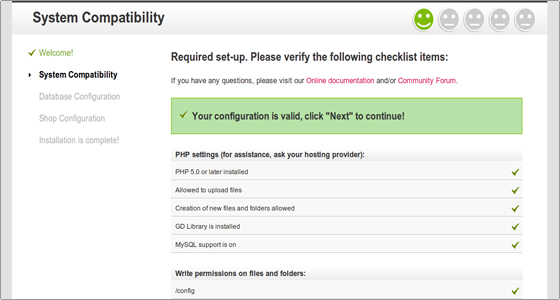
On the next page, the application will perform a system check. Since our servers support PrestaShop flawlessly, you will see a green icon after each check showing that the test is passed.
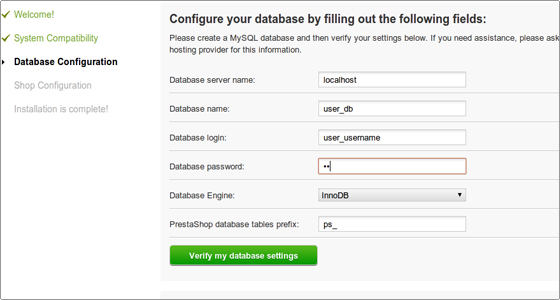
Press the “Next” button again. You will be brought to a screen, where you should enter the MySQL details for the database you have already created. We strongly advise new users to choose the “Full mode: Install all basic modules and add sample products” option below the MySQL details. It will add some sample data to your shop that will help you understand better how the application works.
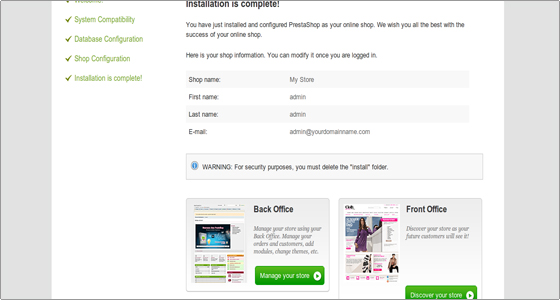
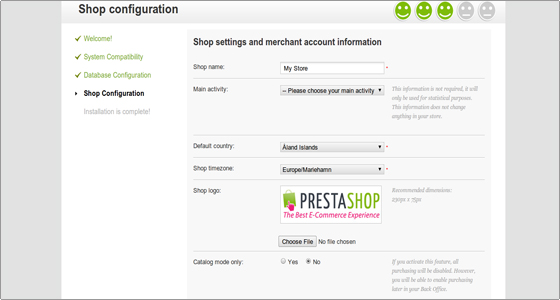
The installation of PrestaShop is almost complete. All you have to do is to enter the login information for the application. Here you should insert a valid e-mail address and optionally upload a logo image for your shop. Once you have done that, just press the “Next” button again.
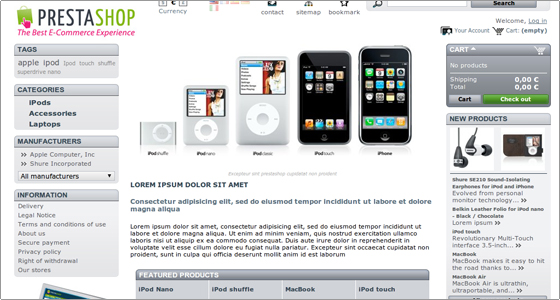
Your PrestaShop application is now installed! It is recommended that you bookmark the links on this page for later, especially the URL to the admin area.