 Phone: 1(877) 215.8104
 Login
LoginThis tutorial will show you how to add tables to your website with Dreamweaver. You may also check our tutorials on How to insert images and text to your website, How to create Jump menus and How to make a photo album with Dreamweaver.
How to create tables with Dreamweaver
![]()
Open Dreamweaver and create a new HTML file. From the Insert drop-down menu choose Table.
A Table property window will appear:
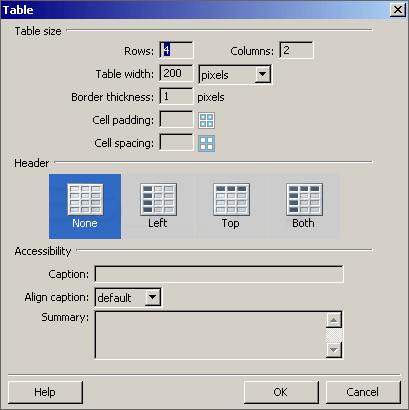
Select the format of your table and click OK. Your table will be created in your page. Select the table and look at its Properties panel:
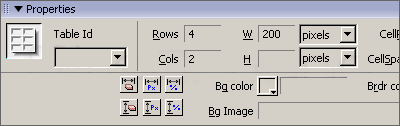
Here you can modify your table by changing its attributes. Each cell of the table has its own Properties panel. Select the cell that you want to modify and the Properties panel will appear. Alternatively, you can go to Windows -> Properties:
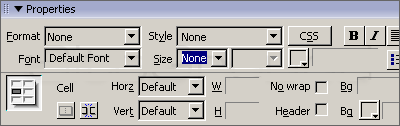
Here you can select a style for the cell, background color, border size and color, text alignment, etc.