 Phone: 1(877) 215.8104
 Login
LoginMediaWiki Softaculous Installation Tutorial
In this tutorial we will show you how to install MediaWiki on your account using the Softaculous auto-installer. The MediaWiki installation process, as with any other installation via Softaculous, is simple, straightforward and will not take more than just a few minutes.
To access the Softaculous auto-installer log in to your cPanel account and find the Softaculous icon located in the “Software Services” section.
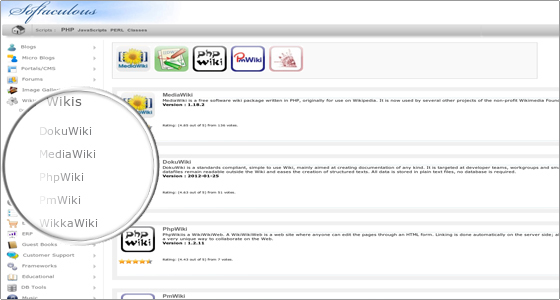
To locate MediaWiki you can either type “mediawiki” (without the quotes) in the search box in the top right corner or click on Wikis in the left column.
When you click on the MediaWiki link, you will be taken to the home page for the MediaWiki package:
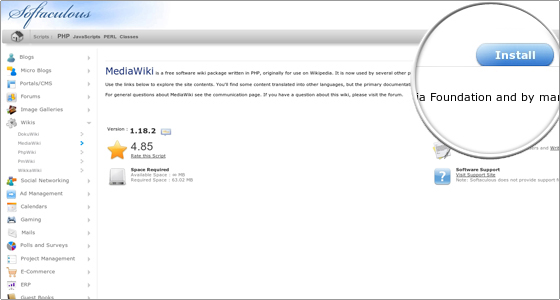
To proceed with the installation, click on the Install tab. You will be asked to fill in the details of the installation:
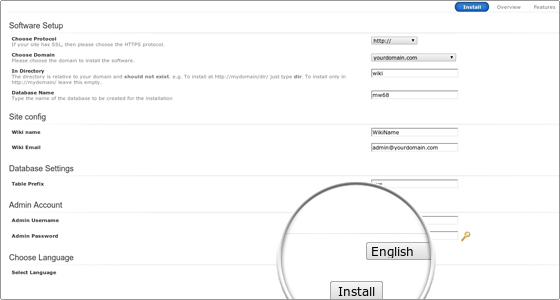
Most fields are already automatically filled in with some data that you can change to your preference. Make sure you type the directory where you want MediaWiki installed in the field for “In Directory”.
You will also probably want to change the “Wiki name” and “Wiki Email” settings, as well as the admin credentials. If you want the installation details emailed to you, type a valid email address in the “Email installation details to” field at the bottom of the page.
When you are ready to proceed with the installation, click Install. You will see the installation progress bar and when it reaches 100%, the installation will be completed:
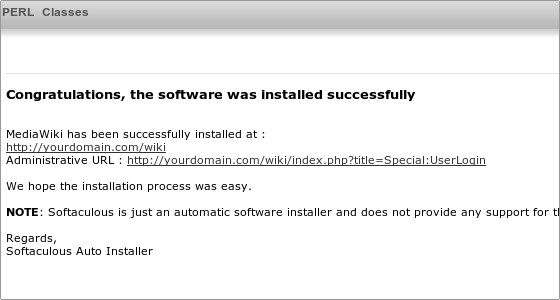
You will be able to access your newly-installed MediaWiki by following the links on the page.