 Phone: 1(877) 215.8104
 Login
LoginIn the following pages of our PhpMyAdmin Tutorial we will describe the functionality of the software, integrated in cPanel.
Once you enter your PhpMyAdmin application, you will see different areas.
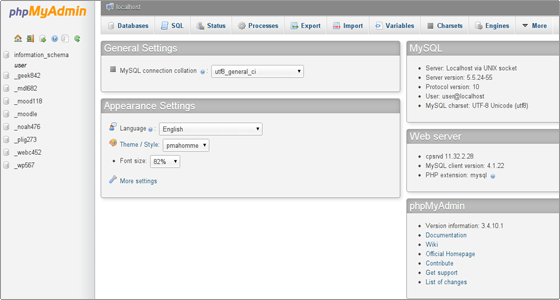
In the upper part you will find the server hostname. The databases which you will manage are stored on the same server as the software and the hostname is: localhost.
Under it there is information regarding the MySQL server, the MySQL client and the PhpMyAdmin version.
Next, you will see the MySQL charset and you will be able to define the MySQL connection collation.
In the right column you can change the default language, alter the style, customize the theme color and the font size. Also there you will notice links to PhpMyAdmin resources.
Please note that you can not create a database directly through cPanel->PhpMyAdmin. However, you can easily create a new database from your cPanel->MySQL Databases. Navigate to the Create New Database box. Enter the database name in the New Database text field and click on the Create Database button. The database name will start with the cPanel user name. For example if your cPanel user name is user and you want to have a database named test, the actual database name will be user_test. You can check our MySQL tutorial for more details.
In the left panel you will see the list of the databases for which your cPanel user has privileges.
The main PhpMyAdmin areas are as follows:
Databases
In the Databases tab you will find a list with all the databases which can be managed through the cPanel user.
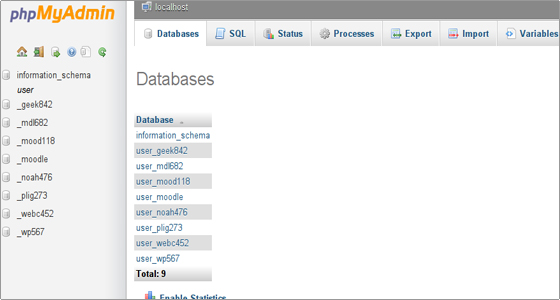
Once you click on a chosen database, you can start its management.
If you enable the statistics for the databases, you will see a table with the used collations, the number of the tables and the rows, the size of the data and the indexes, the total size and the overhead.
Please note that the enabling of the statistics will increase the load caused by your account on the server. Thus it is not recommended when you have many large databases.
Status
You can open the Status tab by clicking on the Show MySQL runtime information link. There you will find detailed information regarding the MySQL server since the last restart.
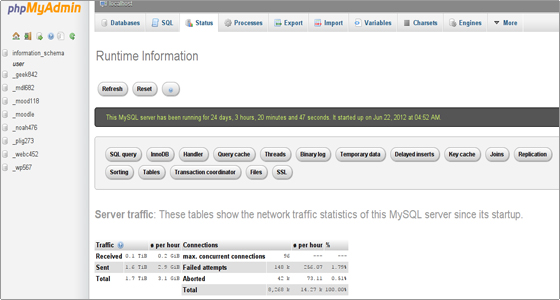
You will see the traffic handled by the MySQL server, the maximum number of simultaneous connections, the total number of connections, the failed and the aborted attempts, the total number of queries sent to the server and more related details.
Variables
The Variables tab will be opened after clicking on the Show MySQL system variables link.
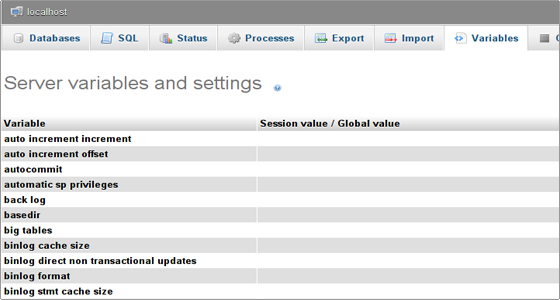
You will see a list with the MySQL server system variables and their values.
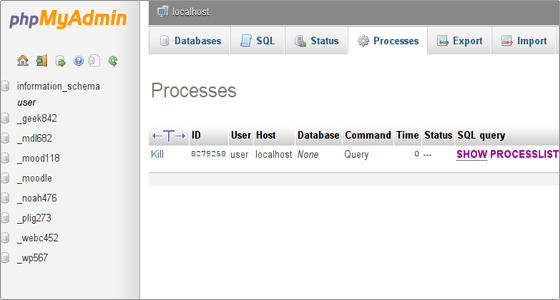
Processes
By clicking on the Processes link you will see all the processes running by your cPanel user.
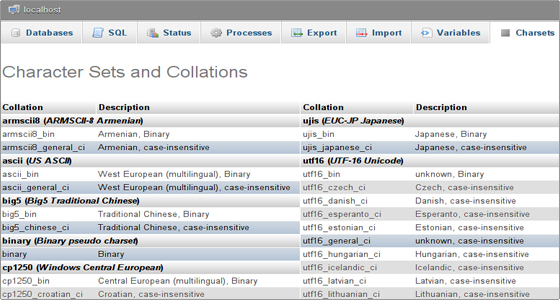
Charsets
The Character Sets and Collations link leads to the Charset area. There you will find all the charsets and collations supported by the MySQL server.
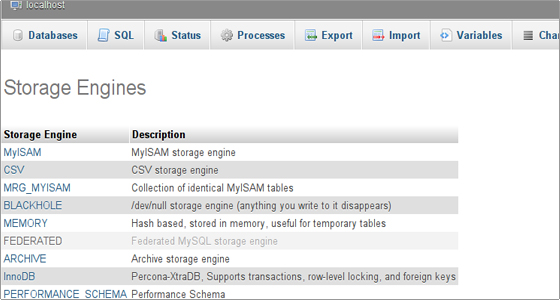
Engines
The Storage Engines link opens a list with all the engines supported by the MySQL server. The default one is MyISAM. Another popular storage engine, used by many databases is InnoDB. More about the MySQL storage engines can be found in the official documentation.
Export
In the Export section you can export your database tables content in different formats (CSV, SQL, PDF, Microsoft Excel, Microsoft Word, XML, and many more). You can select all the database tables or just pick some of them.

You can add custom comments in the header of the exported content. You can decide whether to export just the database structure, the data or both of them. You can export the database tables in a file and compress it or you can visualize the queries directly on the screen.
Import
In the Import section you can import your database tables from a file, saved on your local computer.
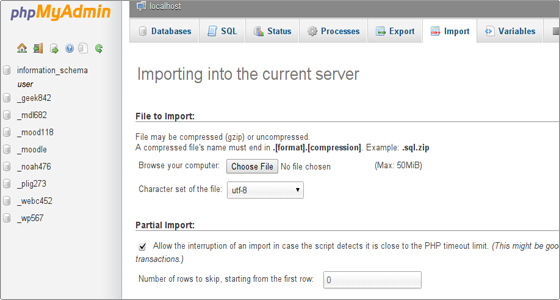
You should browse for the file and pick its character set from the drop-down menu.
If the file is too big, the MySQL server timeout can be reached. In such a case you can interrupt the import action. Then you can continue with the data import defining the number of the queries to be skipped from the file beginning. In this way you will skip the imported queries and continue from the point of the interruption.
Additionally you can pick the SQL server mode of the imported file. You can find more details in the Server SQL Modes documentation.