 Phone: 1(877) 215.8104
 Login
LoginOnce you have finalized the Pligg installation you should login with the chosen administrator login details from the front end of your newly installed Pligg. Once you are logged in as an administrator you will see a link in the main menu that leads to the administration area for the web site.
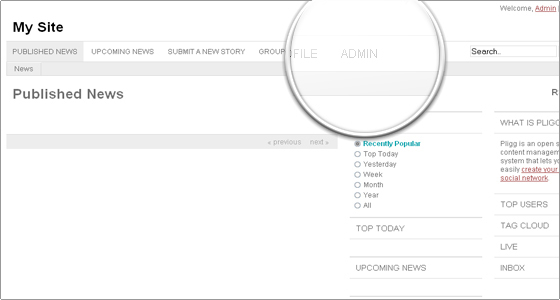
The Admin Home page will display a collection of links used for configuring your site. These links are often generated by modules that have been installed on your site and will point to module configuration and tool pages. There are also duplicate links for items that already exist in the main navigation bar at the top of the admin panel. Of course you can navigate to a certain page in other ways than going back to the main admin page each time. It depends on what is the exact functionality you would like to access.
You will also see general statistics for your Pligg web site such as number of members and groups, total posts, last post date etc. To the right you will see the latest news published on the official Pligg web site. Those will be displayed by default in most areas of the administration backend.
Pligg Administration Main Menu
Manage
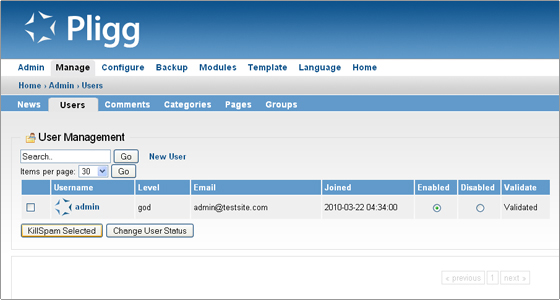
Under the Manage tab of the Administration Main Menu you will see several sub-categories. This is the area where you can manage the news, users, submitted comments, categories, pages and groups for your Pligg web site.
Via the news area you can publish, queue for publish or discard news articles submitted for your website. This is the section you should use in order to publish created articles and submit them as news on your Pligg website front page.
You can add new users and manage existing ones by altering them if need. You can also delete existing users and there is a separate button for “KillSpam Selected” users.
Via Comments section under the Manage tab of Main Menu you can alter all comments published for articles on your Pligg website. You have full control over the comments and you can publish, moderate, discard or completely delete them from the website.
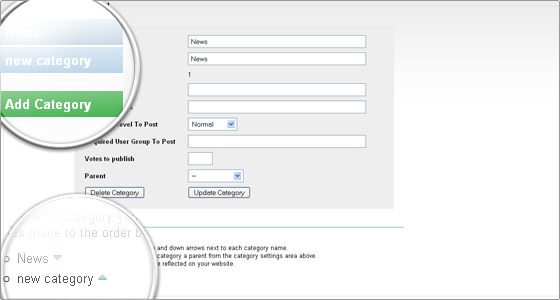
The categories section is one of the most important in this area. This is where you can create new categories and manage existing ones. The interface is as all other areas pretty intuitive and user friendly. A very nice option is the ability to adjust the ordering of the existing categories simply by clicking on the up and down arrows under Category Order section.
Via the Manage -> Pages section you can create new pages for your Pligg website that will be available for publishing once created. You can use this section for creating news articles or other specific pages according to your needs. An important functionality is that HTML is allowed when creating a new page here so you are not limited to simple text only.
Finally the Groups section will provide you with the needed functionality to manage Groups created on your Pligg website. You can create new groups on your own, manage existing ones and approve Groups created by website members.
Configure
This is the are for the general configuration of your Pligg website. Each area contains detailed and easy to follow instruction how to adjust your configuration. Making changes is easy by selecting the desired options from drop-down menus or typing on your own depending on the exact changes you are making.
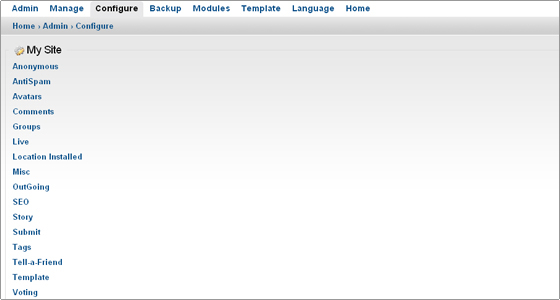
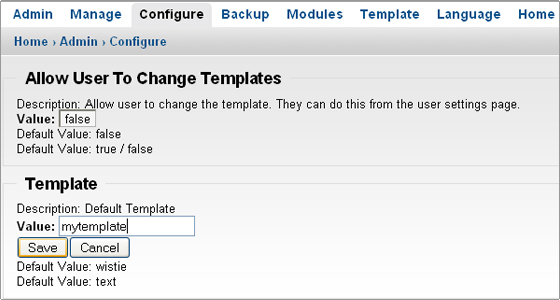
An important functionality of the Configure section is the ability to change the template for your Pligg web site. Prior to changing the template you should upload the template files under the “templates” directory for your Pligg installation. You can do so via an FTP client. Note that the new template directory should be placed directly under “templates”. After you have uploaded the template all you need to do is go to Pligg admin area -> Configure -> Template or simply choose Template from the main administration menu. Click on the template name (by default it is wistie) and enter the name of the new template. This should match the exact name of the template directory you uploaded. For example if you have uploaded the new template files under “plig_directory/templates/mytemplate” you should enter “mytemplate” in the text field. Than click the save button. This will change the template for your website and apply the newly chosen design for the frontend. Note also that here you can allow users to change the template for the website for themselves.
Backup
It is always important to perform regular backups for your web site. Especially when making major changes in the configuration or upgrading to a new version of the script. You can use the default cPanel functionality to create MySQL backups of your Pligg database. Also you can use cPanel -> FileManager or an FTP client to backup the website files. Pligg also provides you internal functionality that will allow you to create backups of the website files and database via the administration backend. Pligg proposes the following easy steps for creating the backup:
-
Click on the Backup All Files link. Once a link appears at the bottom of the page continue to the next step.
- Click on the Backup Avatars link. Once a link appears at the bottom of the page continue to the next step.
- Click on the Backup Database link. Once a link appears at the bottom of the page continue to the next step.
- Right click and “Save target as” (for Internet Explorer) “Save link as” (for Firefox) each of the three links just generated at the bottom of the page from the first three steps. Save all three of the files to your computer.
- Once all of your downloads have finished, click the “Remove all the backups listed below” link.
Modules
Under the Modules section you can enable or disable modules for your Pligg installation. Also here you can alter the settings for installed modules in case this is available as an option for the module in question.
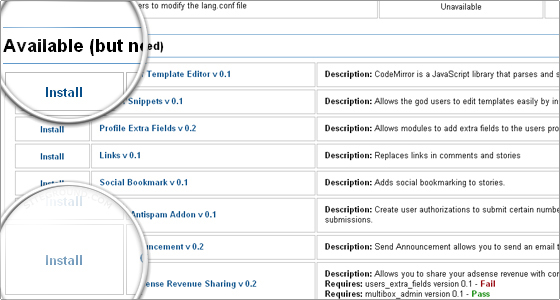
The module installation itself is relatively easy. All you need to do is upload the module files under the “modules” directory for your Pligg installation. This can be done using an FTP client. Once the module files are uploaded you will see it under the modules section and you will be able to enable it for your website. This is done by clicking the Install link under the “Available (but not installed)” section.
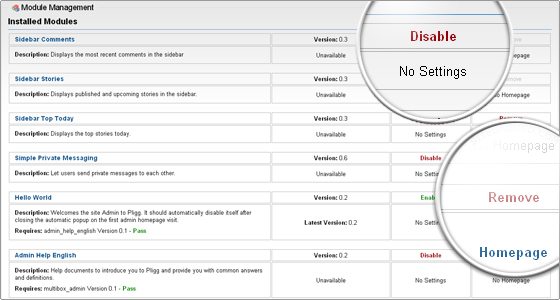
Once the module is installed it will appear in the upper section “Installed Modules” and you can enable it for your website by clicking the “Enable” link for it.
In order to uninstall a module you need to Disable it by clicking the corresponding link then click “Remove”. This will place the module under the “Available (but not installed)” section. In order to completely remove it from your system after that simply delete the module directory from your installation.
Note that it is always important to check whether disabling or removing a module will not break your website functionality especially if it was used on various areas of the website. It is advisable to perform backups before making such changes.
Language
Here you can manage the default texts for your Pligg website. This include the text of all links on your website such as Logout and Register URLs, Search fields, Page not found title and much more. You can use the filter search box to search for words or parts of words that you wish to change thus completely customizing the texts on your website.