Phone: 1(877) 215.8104
 Login
LoginYou can download a free Dolphin template here.
Extract the archive on your local computer and using your favourite FTP client upload the template files under your Dolphin templates subfolder. You can check our FTP tutorial for more details on how to upload files.
We will pick a random template from the above source and we will explain in details how to install it.
Download and extract the archive on our local computer.
The template directory including all the files and subfolders should be uploaded in the dolphin_installation_folder/templates folder. If your Dolphin script is accessible through http://www.yourdomainname.com/dolphin, then the path will be public_html/dolphin/templates.
Also there you will find the readme.txt file. The file is specific for each template and contains detailed installation instructions.
After the end of the upload make sure that the file permissions of the uploaded files and folders are 755. More about the way to change the file permissions can be found in our FTP tutorial.
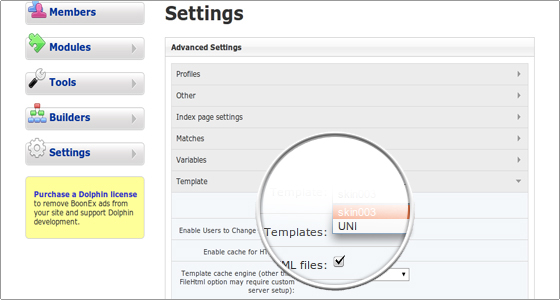
Next, you should open the Dolphin admin area->Settings->Advanced Settings->Template. Find the Template drop-down menu and pick the uploaded skin. Click on the Save Changes button to complete the change.
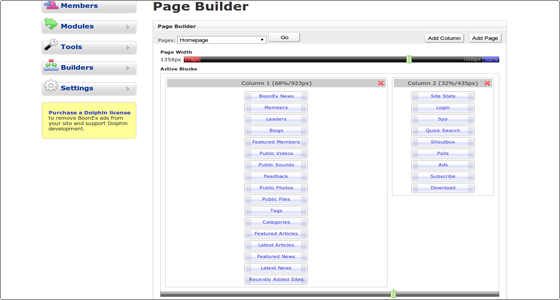
The last step is to adjust the home page and the columns sizes. Navigate to the Dolphin admin area->Builders->Pages Blocks->Select Page->Homepage. Set the Page Width and the columns width as per the instructions listed in the readme.txt file for the specific template.
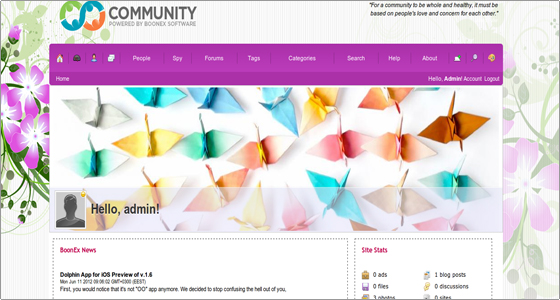
Now you can check the web site’s visual appearance by opening it in your web browser.
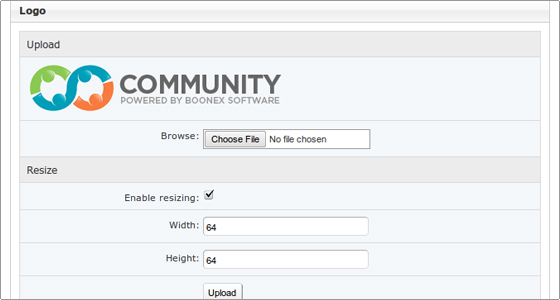
If you want to change the main logo, navigate to the Dolphin admin area->Settings->Basic Settings->Logo. Pick the new image from your local computer and click on the Upload button.