 Phone: 1(877) 215.8104
 Login
LoginInstalling PHP-Nuke manually is a little bit harder than the Fantastico Auto-Installer procedure. It involves downloading of the source tarball, configuring the application and importing a MySQL database.
Creating a subdirectory and a database for PHP-Nuke
First, let us prepare your account for the installation. We will need a directory where PHP-Nuke files will be uploaded and a database, where it will store its data.
STEP 1 Create a directory for the PHP-Nuke files.
To create a new directory, please follow our CPanel -> FileManager tutorial.
If you would like manually to install phpNuke in the main directory of your website (and not in a subfolder), all you need to do is to upload phpNuke files in the public_html folder of your account.
STEP 2 Create a MySQL database and a user.
Second, let us create the database and the user for phpNuke. Please, follow the instruction in the MySQL database and user tutorial and create a database for the PHP-Nuke installation. For example, you can call it nuke.
Your hosting account is now prepared for the PHP-Nuke installation.
Installing PHP-Nuke
STEP 1 Download the PHP-nuke files.
We should now obtain the script files and upload them to your account. PHP-Nuke official web site is located at http://www.phpnuke.org and we are going to download the latest PHP-Nuke release from there. Here is a direct link to the latest source tarball:
http://www.phpnuke.org/modules.php?name=Downloads&d_op=viewdownload&cid=1
Visit the page and download the latest zip file containing the phpNuke files. Once downloaded, please unzip it using any archive program (such as WinZip or WinRar) somewhere on your computer. This will create 3 different directories: ‘html’, ‘sql’ and ‘upgrades’.
STEP 2 Config.php
The phpNuke files reside under the ‘html’ directory, but before uploading them we will need to change the database configuration values in the ‘config.php’ file. To do so, please open the ‘config.php’ file inside the ‘html’ directory using your favorite text editor (preferably NotePad) and locate the following 4 lines:
$dbhost = “localhost”;$dbuname = “root”;$dbpass = “”;$dbname = “nuke”;
You should change them to reflect your newly created database and username. Change the words between the quotations with the right values.
$dbhost = “localhost”;$dbuname = “username_nuke”;$dbpass = “yourpass”;$dbname = “username_nuke”;
STEP 3 Upload the PHP-Nuke files.
After you have modified the ‘config.php’ file and added the correct values, please save the file in the same directory and overwrite the previous one.
Now we should upload the PHP-Nuke files. This can be easily done using any FTP client program. You can check our FTP tutorial here.
STEP 4 Populate the MySQL database.
Meanwhile, we will populate the database we have created earlier. Please, open CPanel ->phpMyAdmin tool and a new page will load. Please, select the database you have created from the drop-down menu at the left-hand side and wait for the right side of the screen to update. Once fully loaded, click on the ‘Import’ tab and then on the Browse button. This will open a file upload browser window. Please, navigate to the ‘sql’ directory, which comes with the phpNuke archive file and which we have previously extracted on your local computer. There should be only one file called nuke.sql. Double click on it and then click on the Go button. The process might take up to several minutes to complete and at the end you should see ‘Import has been successfully finished’ confirming that the procedure was completed successfully.
To finalize the installation and create the administrative user, please go to your admin.php page. In your case this will be either http://www.yourdomainame.com/subfolder/admin.php or http://www.yourdomainame.com/admin.php. Fill in the form and submit it:
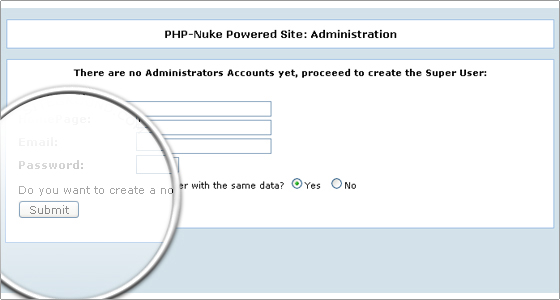
You have successfully installed PHP-Nuke on your account.
lease, note that as of February 2006, for the latest official releases of PHP-Nuke you will be charged an appropriate fee. Learn more here.