 Phone: 1(877) 215.8104
 Login
LoginFirst you need to download the script from their official website. The package need to be extracted then uploaded under the desired directory for your web hosting account. If you would like the Pligg website accessible via URL of type http://mysite.com/pligg you should upload the extracted files under “public_html” folder for your account in a sub-folder “pligg”. You can upload the files from your computer to your hosting account using an FTP Client.
The second step is to create a new database that will be used for the Pligg installation and assign a user with privileges to it. This can be easily accomplished following our MySQL Tutorial.
These are all pre-installation steps you need to accomplish. You can now initiate the installation itself by visiting the location where you uploaded your Pligg installation package via a web browser. The first screen that will load will ask whether you have already setup Pligg.
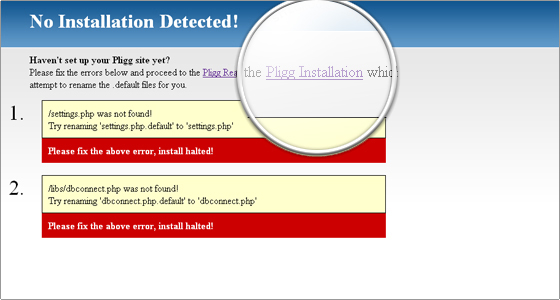
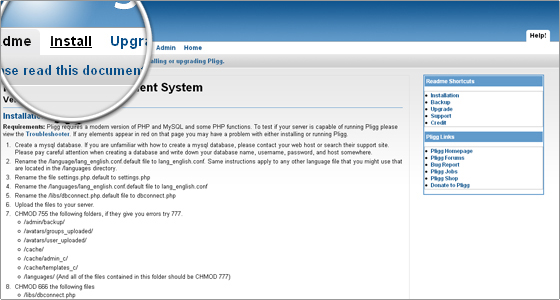
Click the Pligg Installation link that will be provided and you will be redirected to the installation Readme.
Here you can find the Pligg installation requirements as well as step by step instructions how to accomplish the installation. To continue click the Install tab.
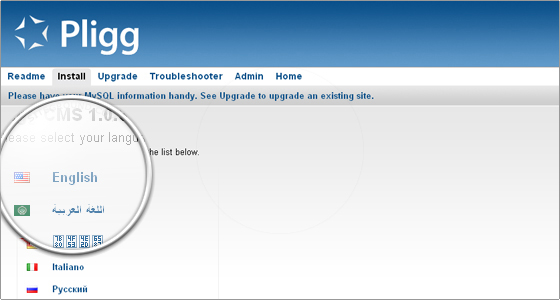
The next page will ask you to choose the desired language for the installation. In this case we will chose English.
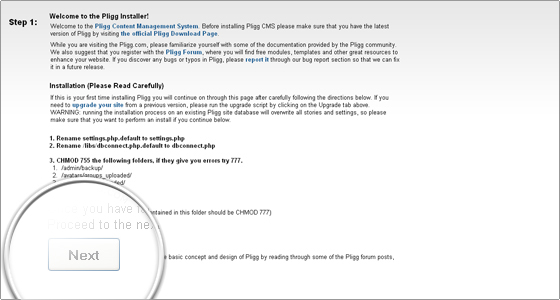
This is the first actual installation step. Here you will be advised to adjust files and folders permissions. Everything will be absolutely automatic and if you have correctly uploaded the files no changes are required at that point. You can click the Next button and proceed with the installation.
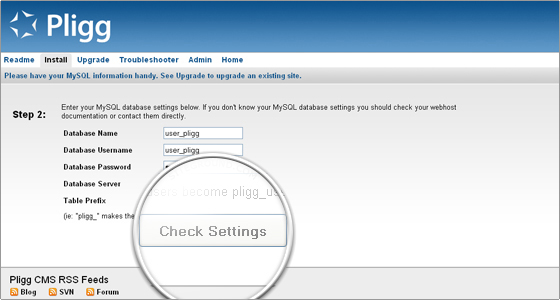
The new page that will load is where you should enter your database details. Use the details for the database you have setup according to the instructions in the beginning of this tutorial. Then click the Check Settings button.
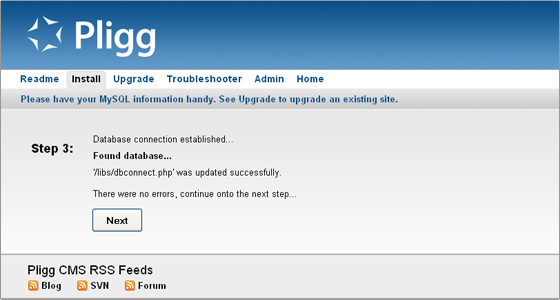
If the details were correctly entered you will get the following confirmation.
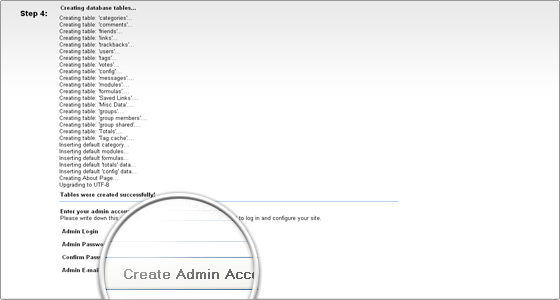
You can now click the Next button. This will create the tables for the Pligg installation in the provided database and you will be prompted to enter the desired administration login details. Once you have entered them click the Create Admin Account button.
This will finalize the installation.
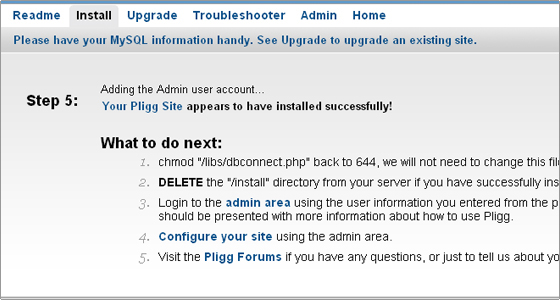
The next page that will load explains the next steps you should take. Step one should have been automatically completed and no actions are required. You should make sure the “install” directory is deleted. You can remove it via your FTP client or cPanel -> File Manager. The next three steps provide links to the newly installed Pligg Administration Home Panel, the Admin Configuration area and the official Pligg forums.
For more information how to manage your newly installed Pligg CMS check the following articles in this tutorial.