Phone: 1(877) 215.8104
 Login
LoginIn this tutorial we will explain how to install SilverStripe.
Follow the steps below to complete the installation.
STEP 1 Create a MySQL database and add a new user to it. This can be done easily with cPanel by following the MySQL database tutorial.
STEP 2 Download the latest SilverStripe package from the official SilverStripe website.
STEP 3 Upload the package to your web hosting account and extract it there. The files will be extracted in a folder called silverstripe-<version>.
If you wish to have the application accessible directly through www.yourdomain.com, you should move the application’s files directly to your public_html folder.
STEP 4 SilverStripe has a known issue with two PHP classes – HTTPResponse and HTTPRequest.
In order to be able to complete the installation correctly and use the application properly, you need to replace all instances of the class HTTPResponse with SSHTTPResponse and all instances of the class HTTPRequest with SSHTTPRequest in the SilverStripe files.
You should also rename these two files:
sapphire/core/control/HTTPResponse.php
sapphire/core/control/HTTPRequest.php
to
sapphire/core/control/SSHTTPResponse.php
sapphire/core/control/SSHTTPRequest.php
The in-file replacement of text is not an easy task and if you had to do it manually, it would probably take you at least several hours. This is why it would be best to do it all at once, either using SSH or through a cron job.
The command that should be executed is:
cd /home/user/public_html; for i in `find -name "*.php"`;
do sed -i 's/HTTPResponse/SSHTTPResponse/g' $i; done;
cp -a sapphire/core/control/HTTPResponse.php sapphire/core/control/SSHTTPResponse.php;
for i in `find -name "*.php"`;
do sed -i 's/HTTPRequest/SSHTTPRequest/g' $i; done;
cp -a sapphire/core/control/HTTPRequest.php sapphire/core/control/SSHTTPRequest.php
Don’t forget to replace user with your cPanel username. And if you have run the command as a cron job, it would be best to remove it once it has been executed.
STEP 5 Proceed with the SilverStripe installation by visiting www.yourdomain.com:
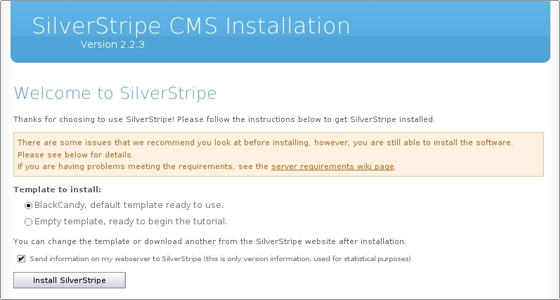
For the purpose of this tutorial we will install SilverStripe with the default BlackCandy template.
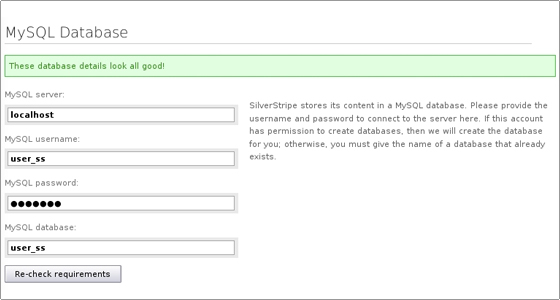
The first time you load the installation page you may see various warnings and errors. Don’t worry about those, as soon as you fill in the MySQL details and click the “Re-check requirements” button, they will go away 🙂
The only warnings that may remain are in the Webserver Configuration section, all other requirements should be met without any problems:
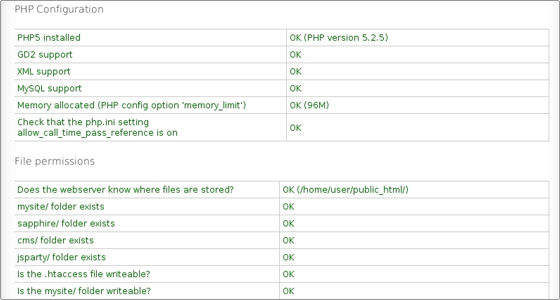
You can disregard the warnings in the Webserver Configuration section.
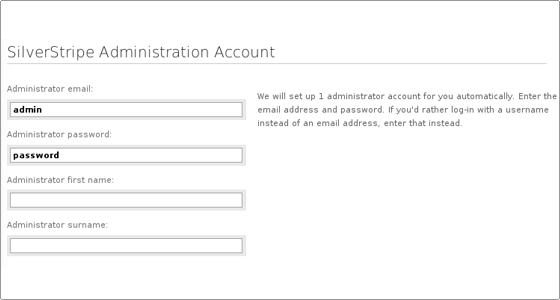
STEP 6 Fill in the login details for the SilverStripe administrative user.
STEP 7 Click the “Install SilverStripe” button and allow a few seconds for the installation to complete.
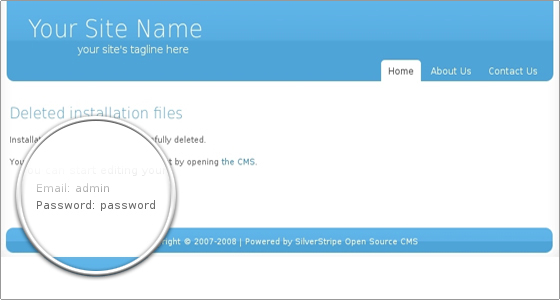
Once the installation is completed, you will be redirected to the installation successful page:
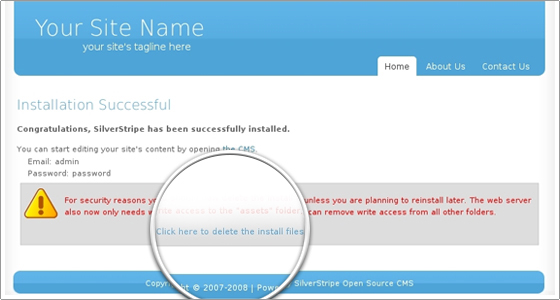
STEP 8 Follow the link “Click here to delete the install files” to delete the installation files.
If you have followed all steps correctly, you will have a fully functional SilverStripe installation and you will be ready to start adding content to your website.